Another week of the same work as the last. Lots of clash detection and moving conduit out of the way of HVAC. A trick I learned in Navisworks, the software that shows other trades, you can section off only what I want to export from Revit to Navis. The export feature allows you to append only what you have modeled to compare with the trades. This helps to not overload the software and make it run smoothly when you are trying to work quickly in one specific area. The model can also be refreshed without having to reopen it constantly.
Once inside Navis you can look up specific conduit IDs and then look up the precise location of it in Revit. This helps to find what you need to move instantly instead of having to scroll around and compare the floor in Navis and Revit. Navis also has a measuring tool. It can adjust and snap to the all sides of two objects you are trying to measure between. A very helpful tool when trying to fit conduit into tight spaces that need exact measurements. The Navis software also allows you to view every floor of the building or project. As well as adjust that floor and check on and off different planes for different floors or adjust horizontally or vertically what is displayed
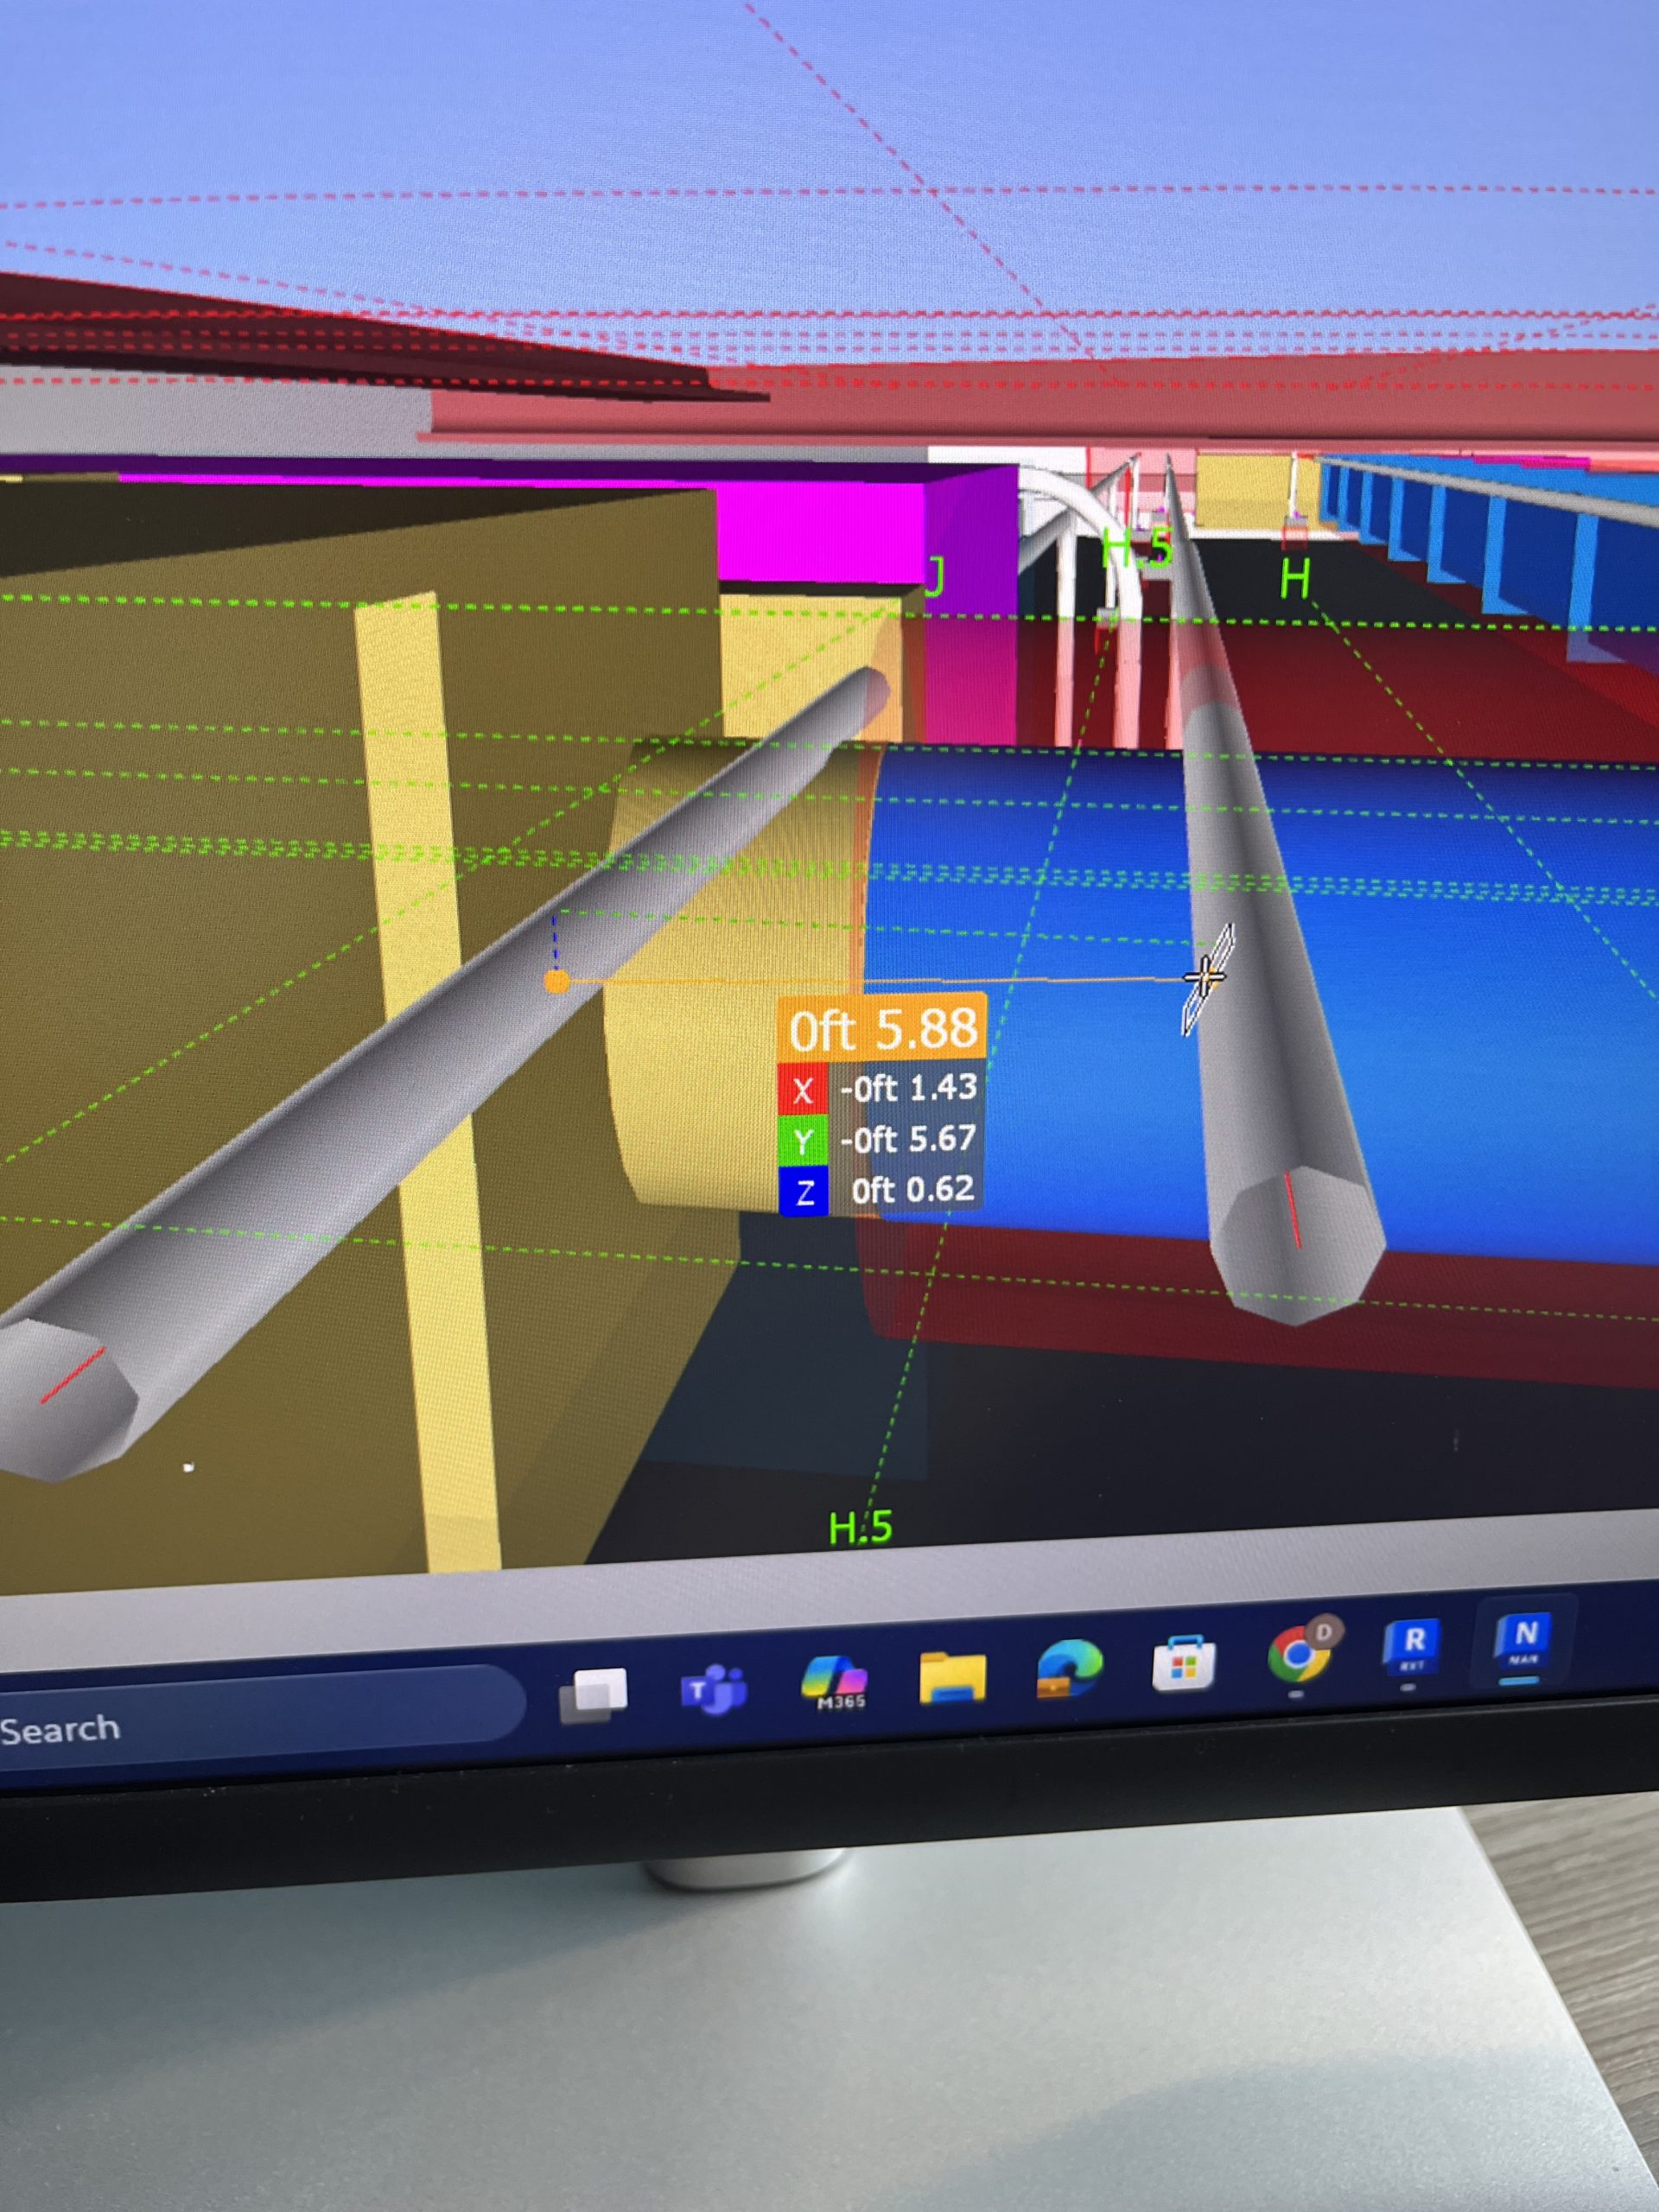
Here is a picture of the measuring tool. Getting the measurement of the side of one conduit to another.
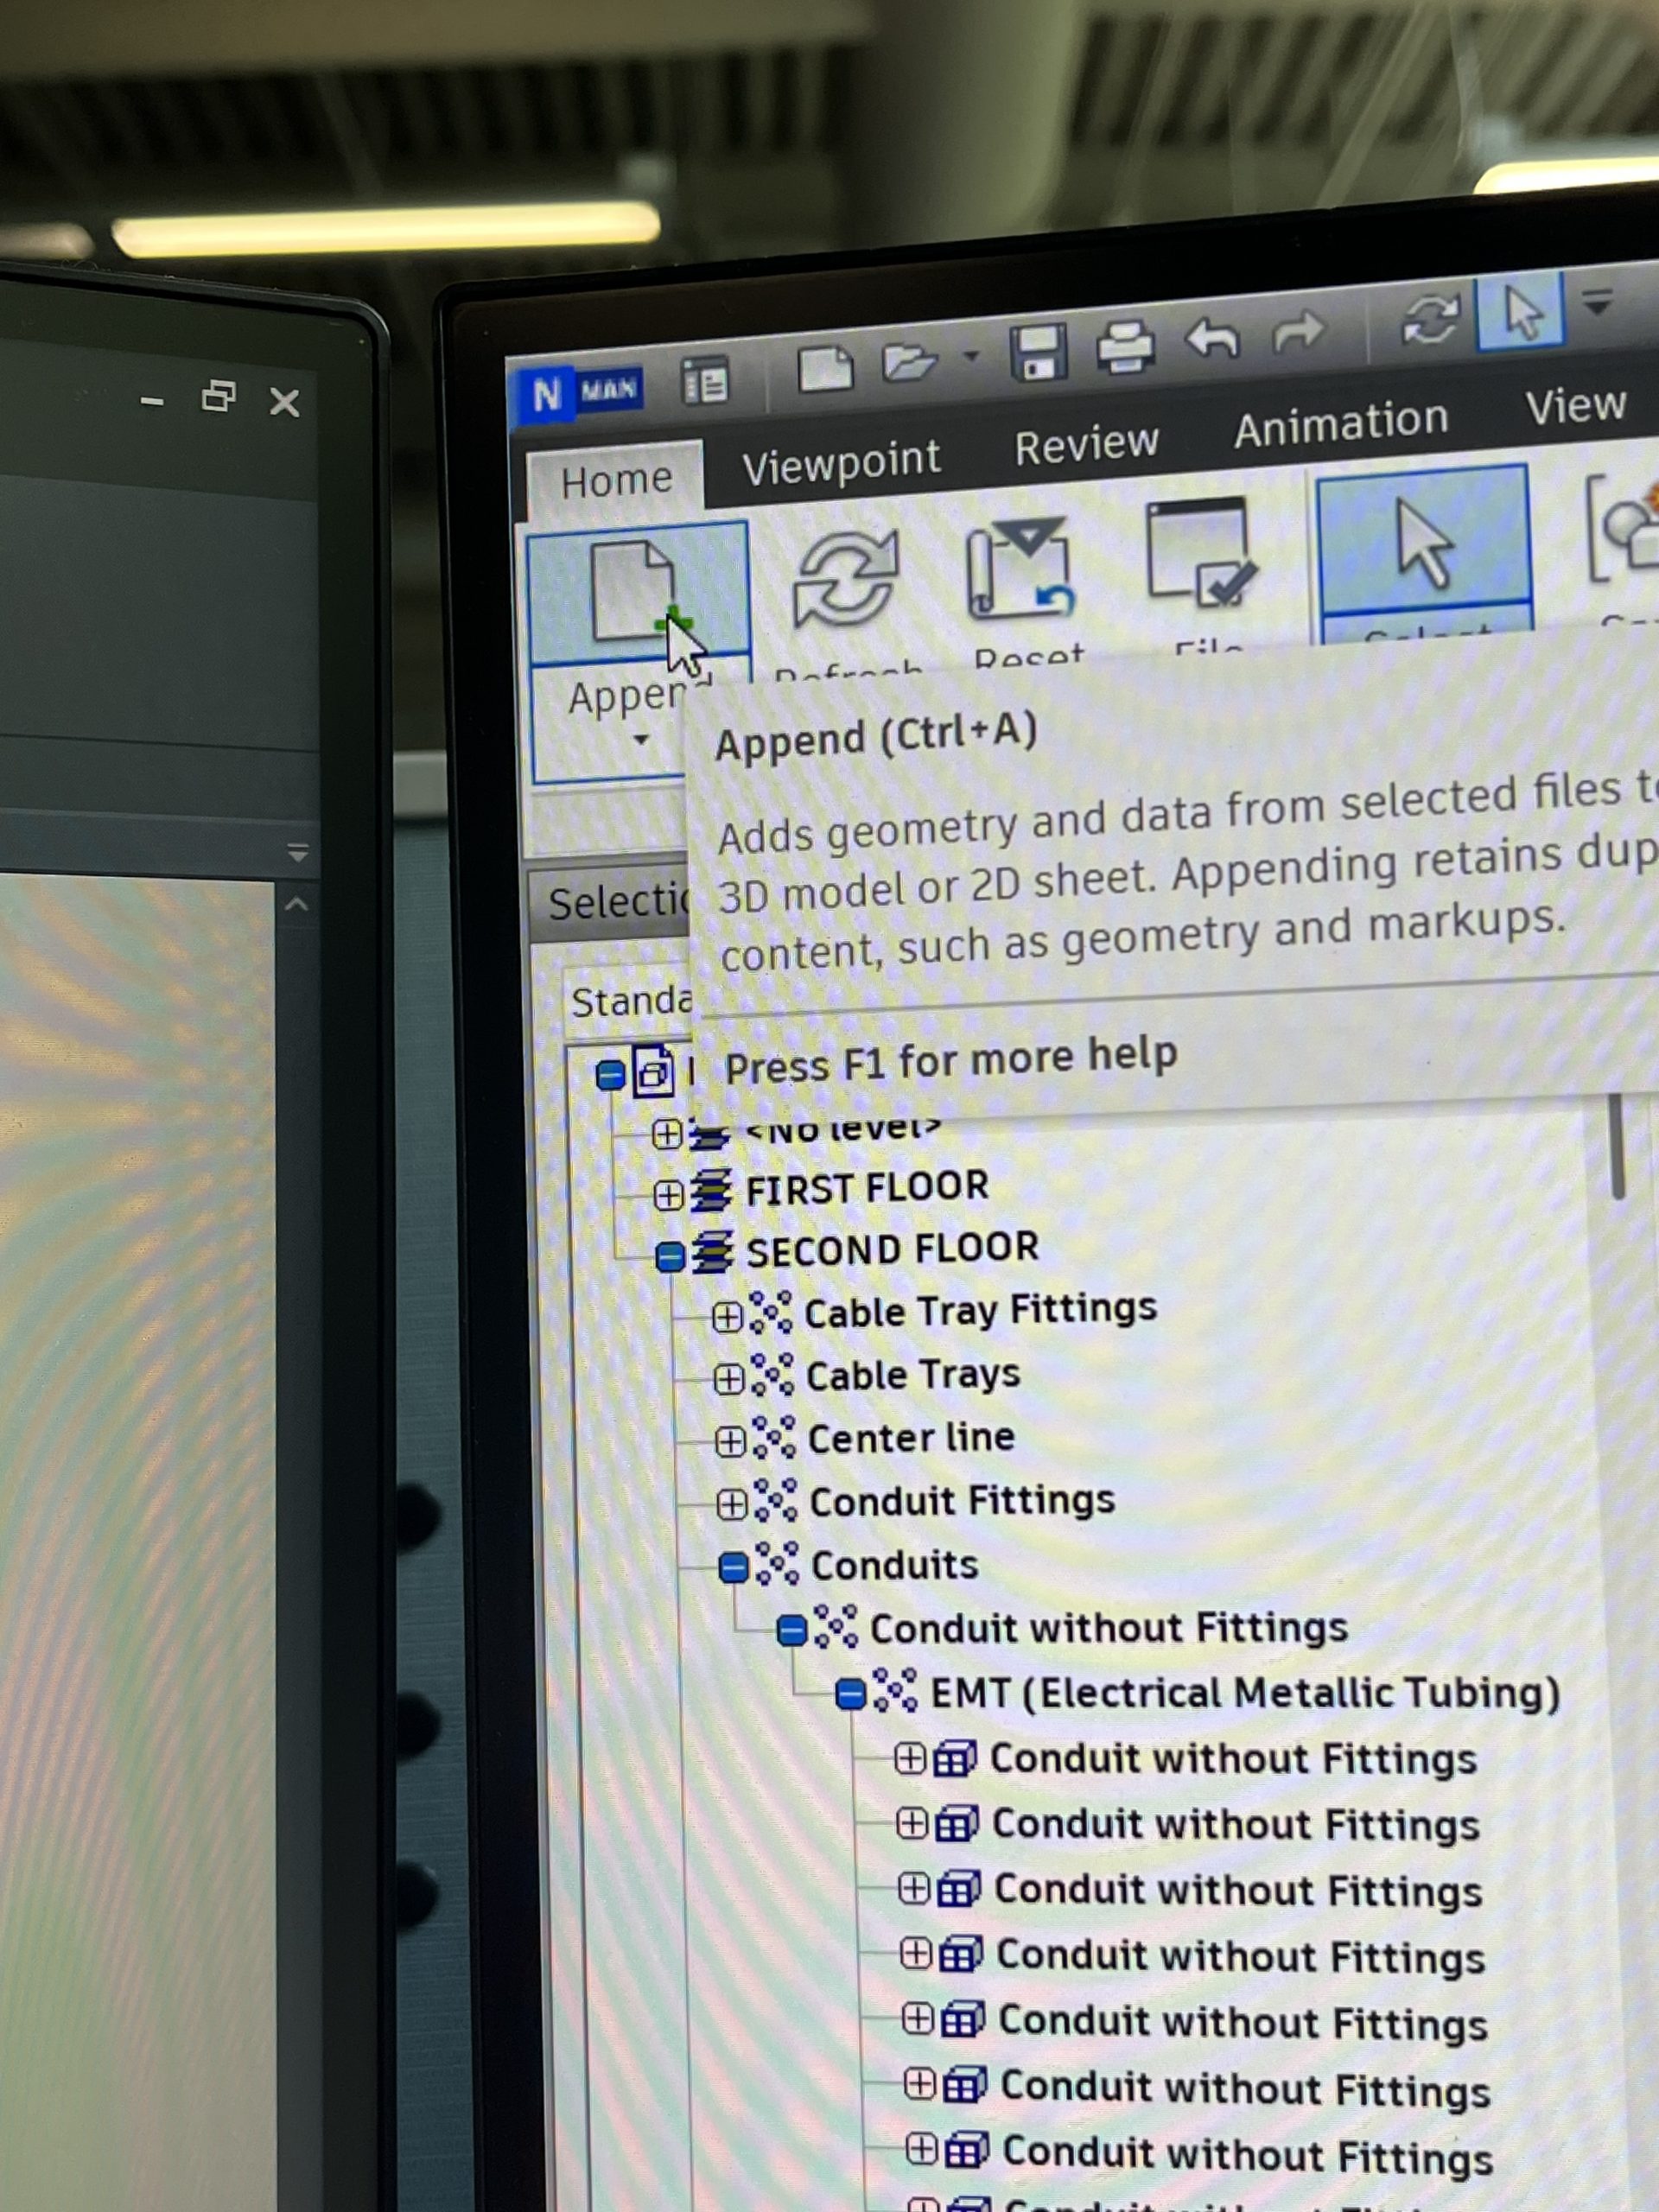
This picture is the exported file from Revit appended to the Navis main file along with the refresh button when changes are made.
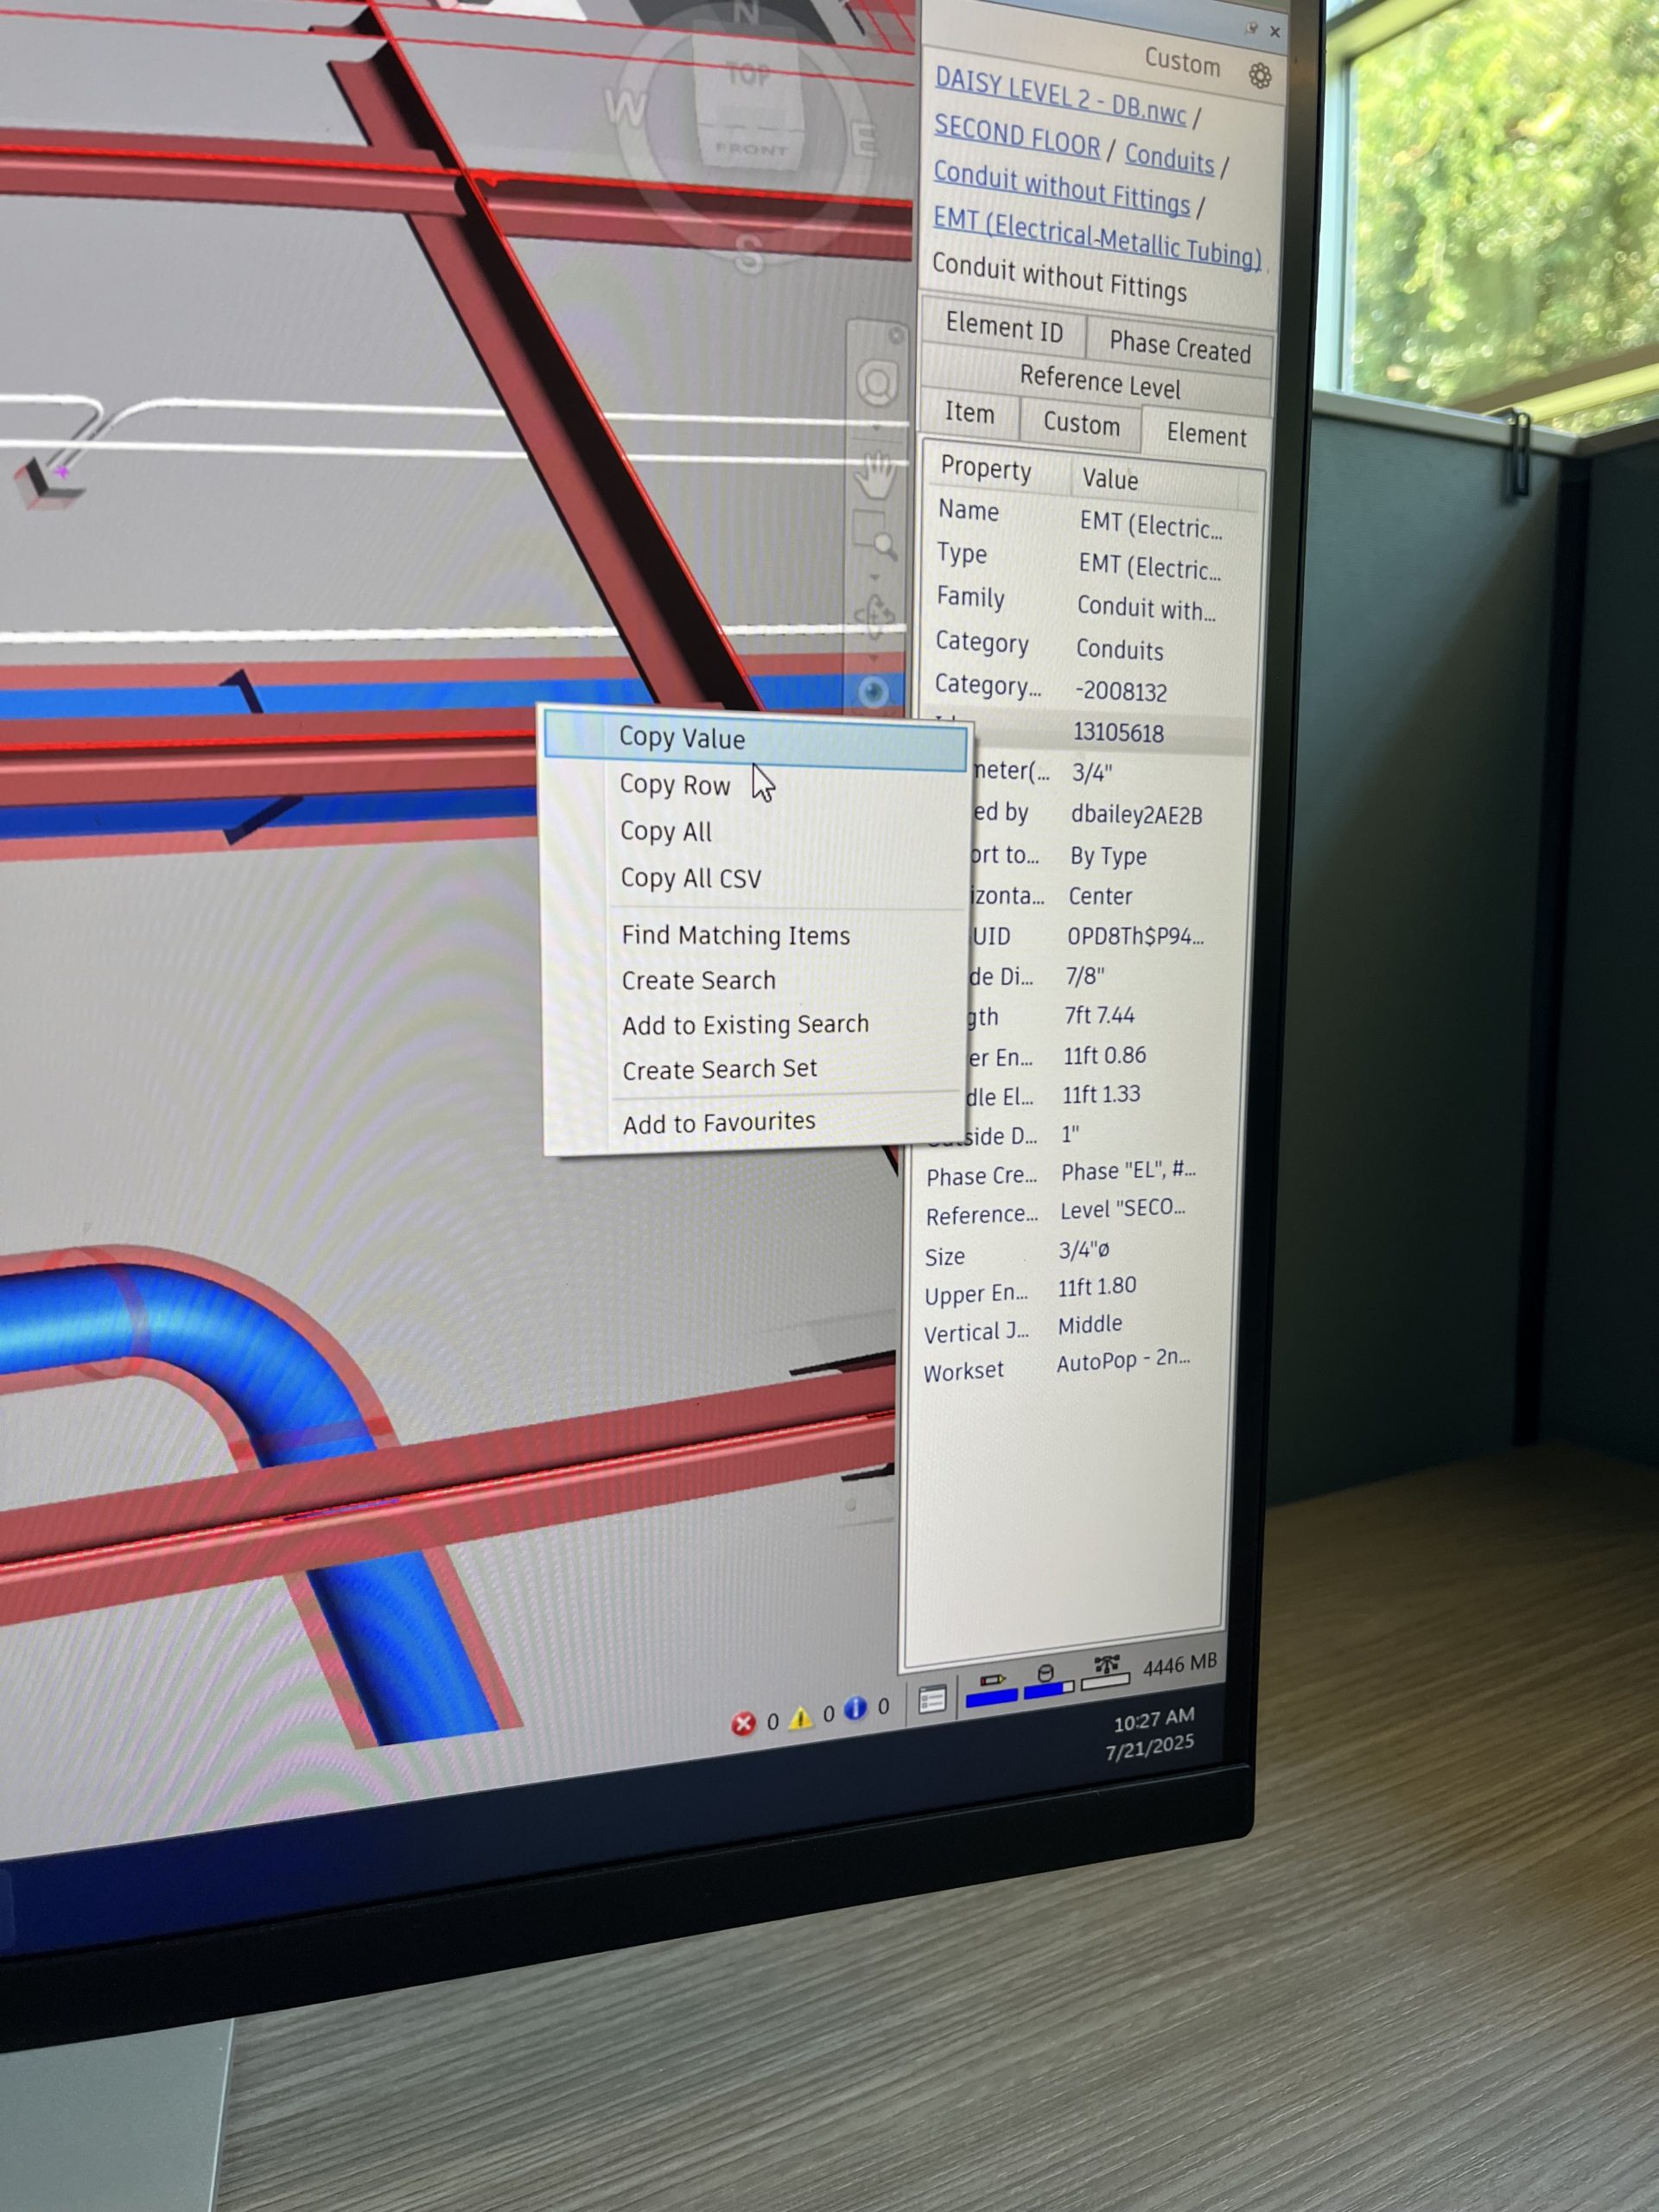
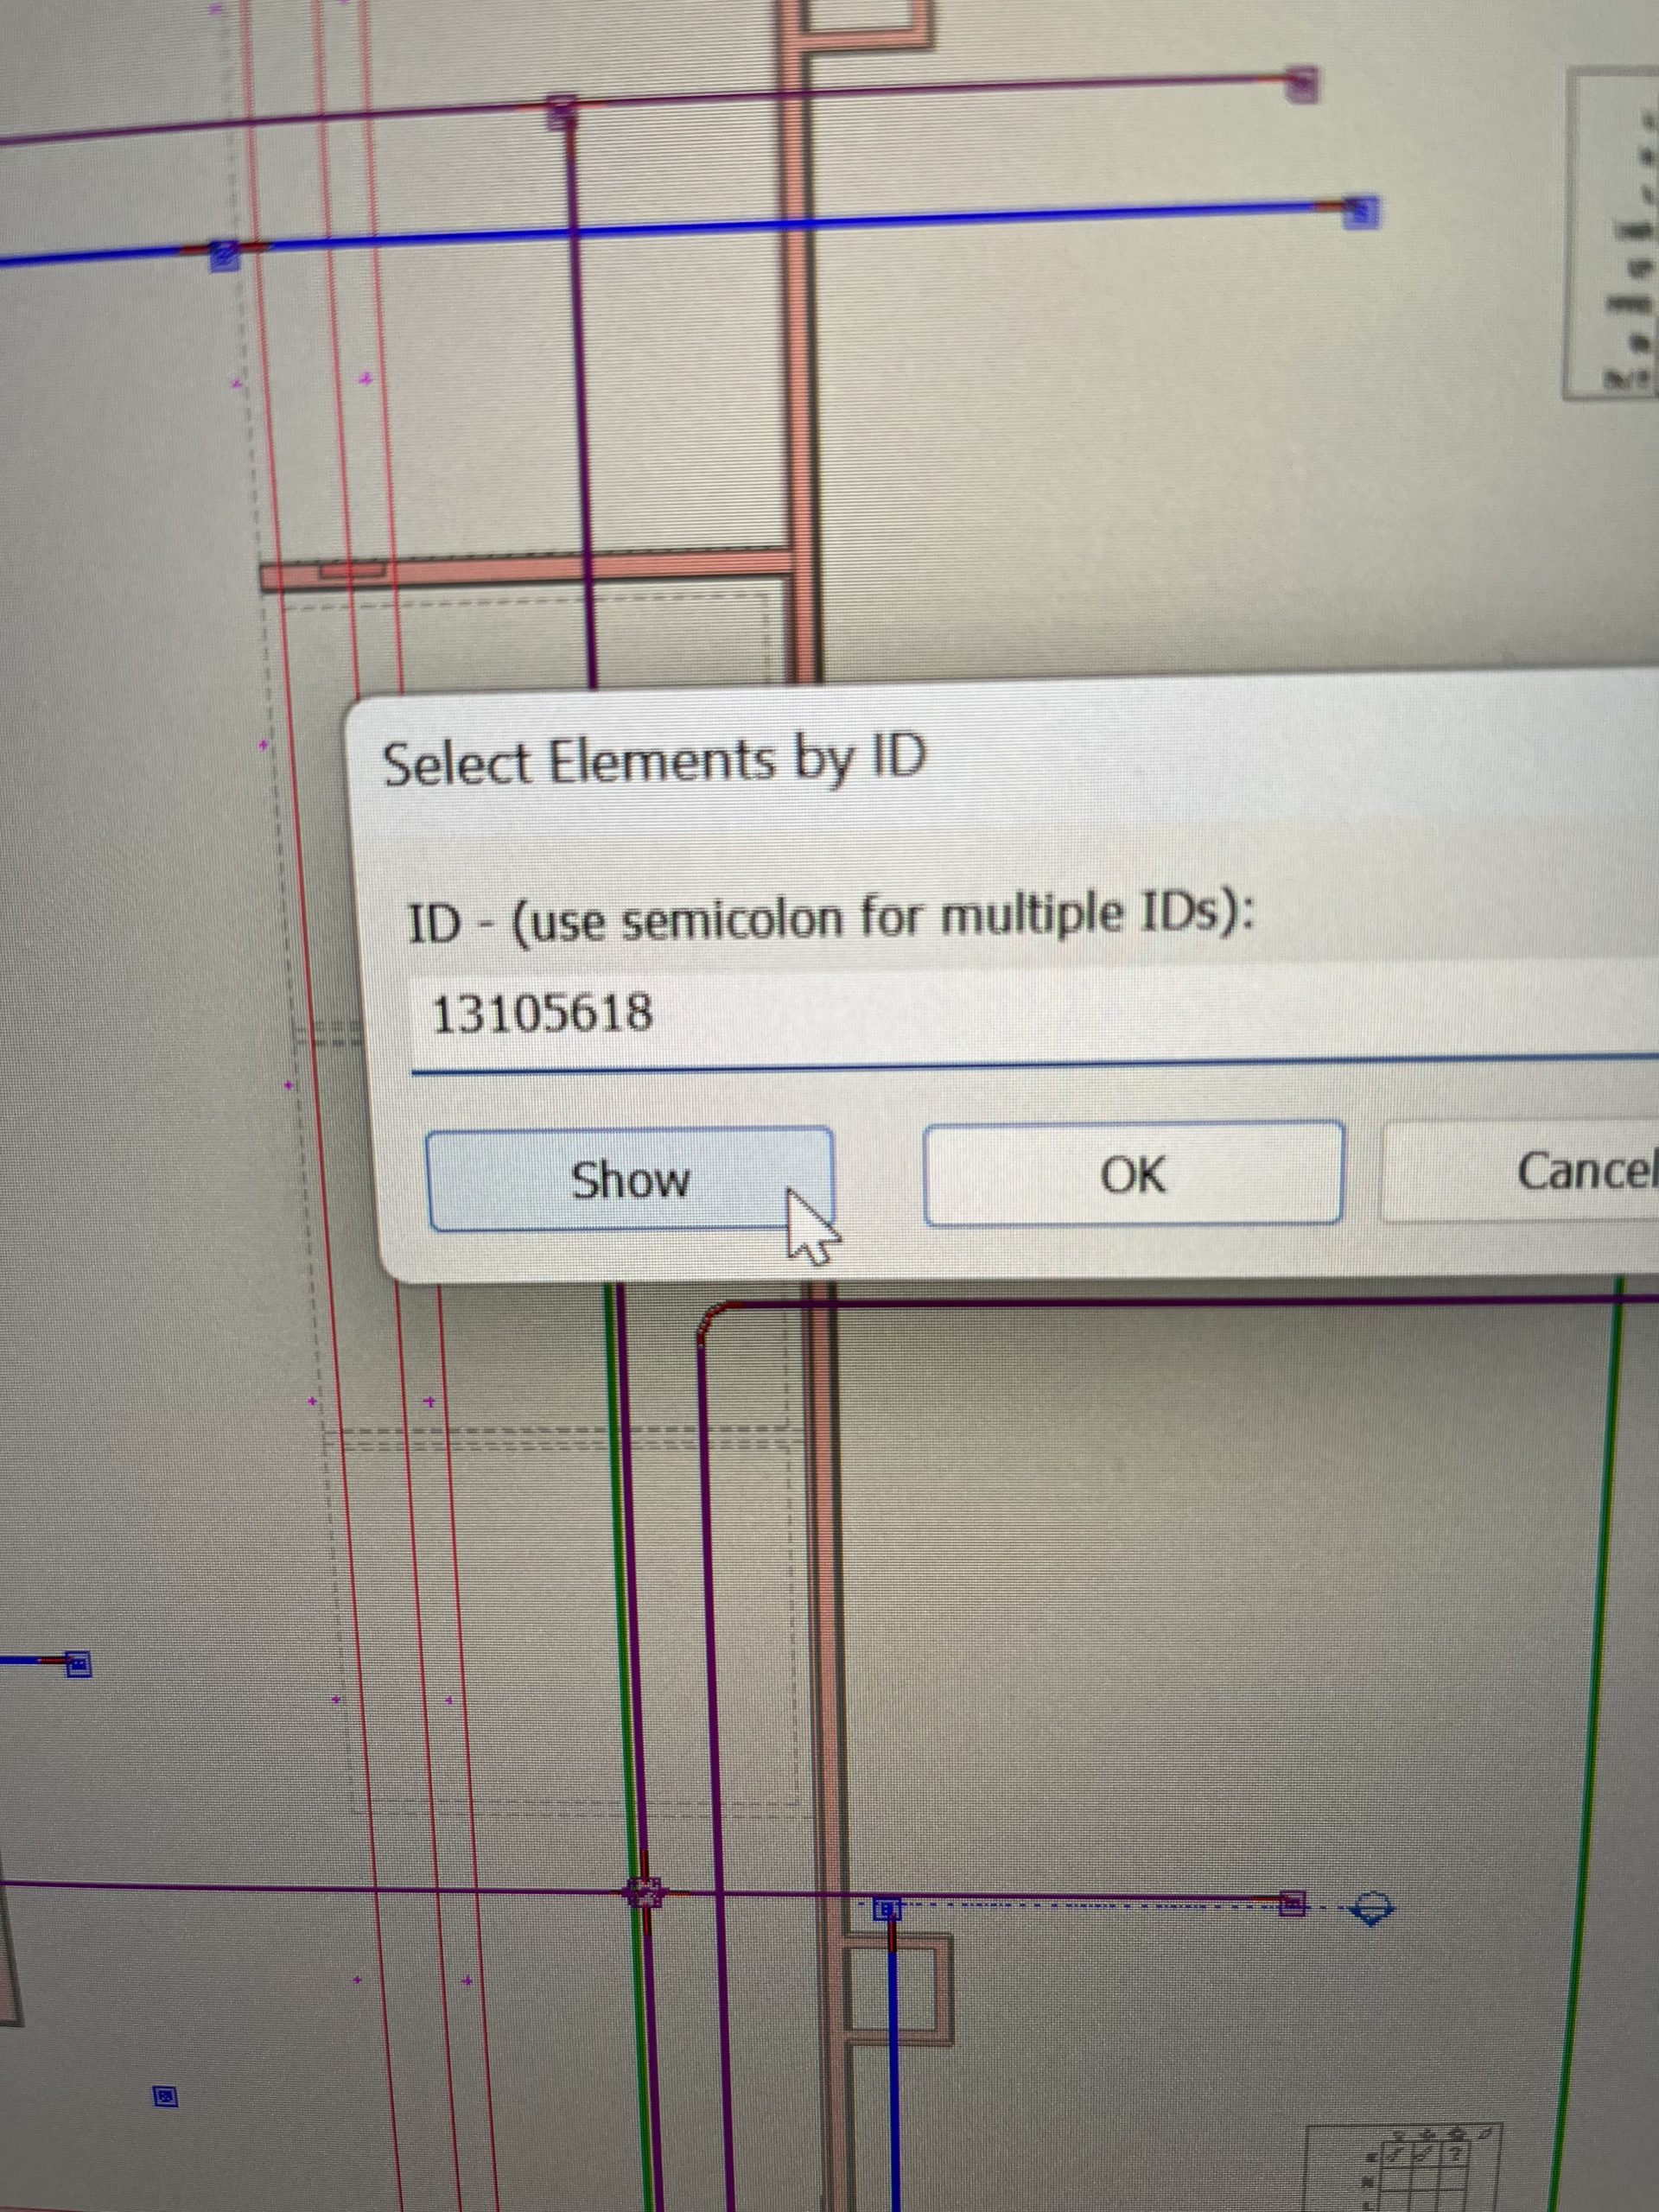
These two pictures are showing how you can lookup the conduit IDs from Navis to Revit
Although this week was more of the same as the past couple it was no less rewarding and fulfilling.
Thanks for the screenshots. These helped me to get a better sense of the software interface. I can see now that it is very similar to the way that AutoDesk and Unity organize elements of the project. This should help you as you get into our 3D modeling courses, and conversely, those students should find your construction-focussed software familiar. Just one more career path for Digital Artists.