All posts by Dalton Bailey

Final week

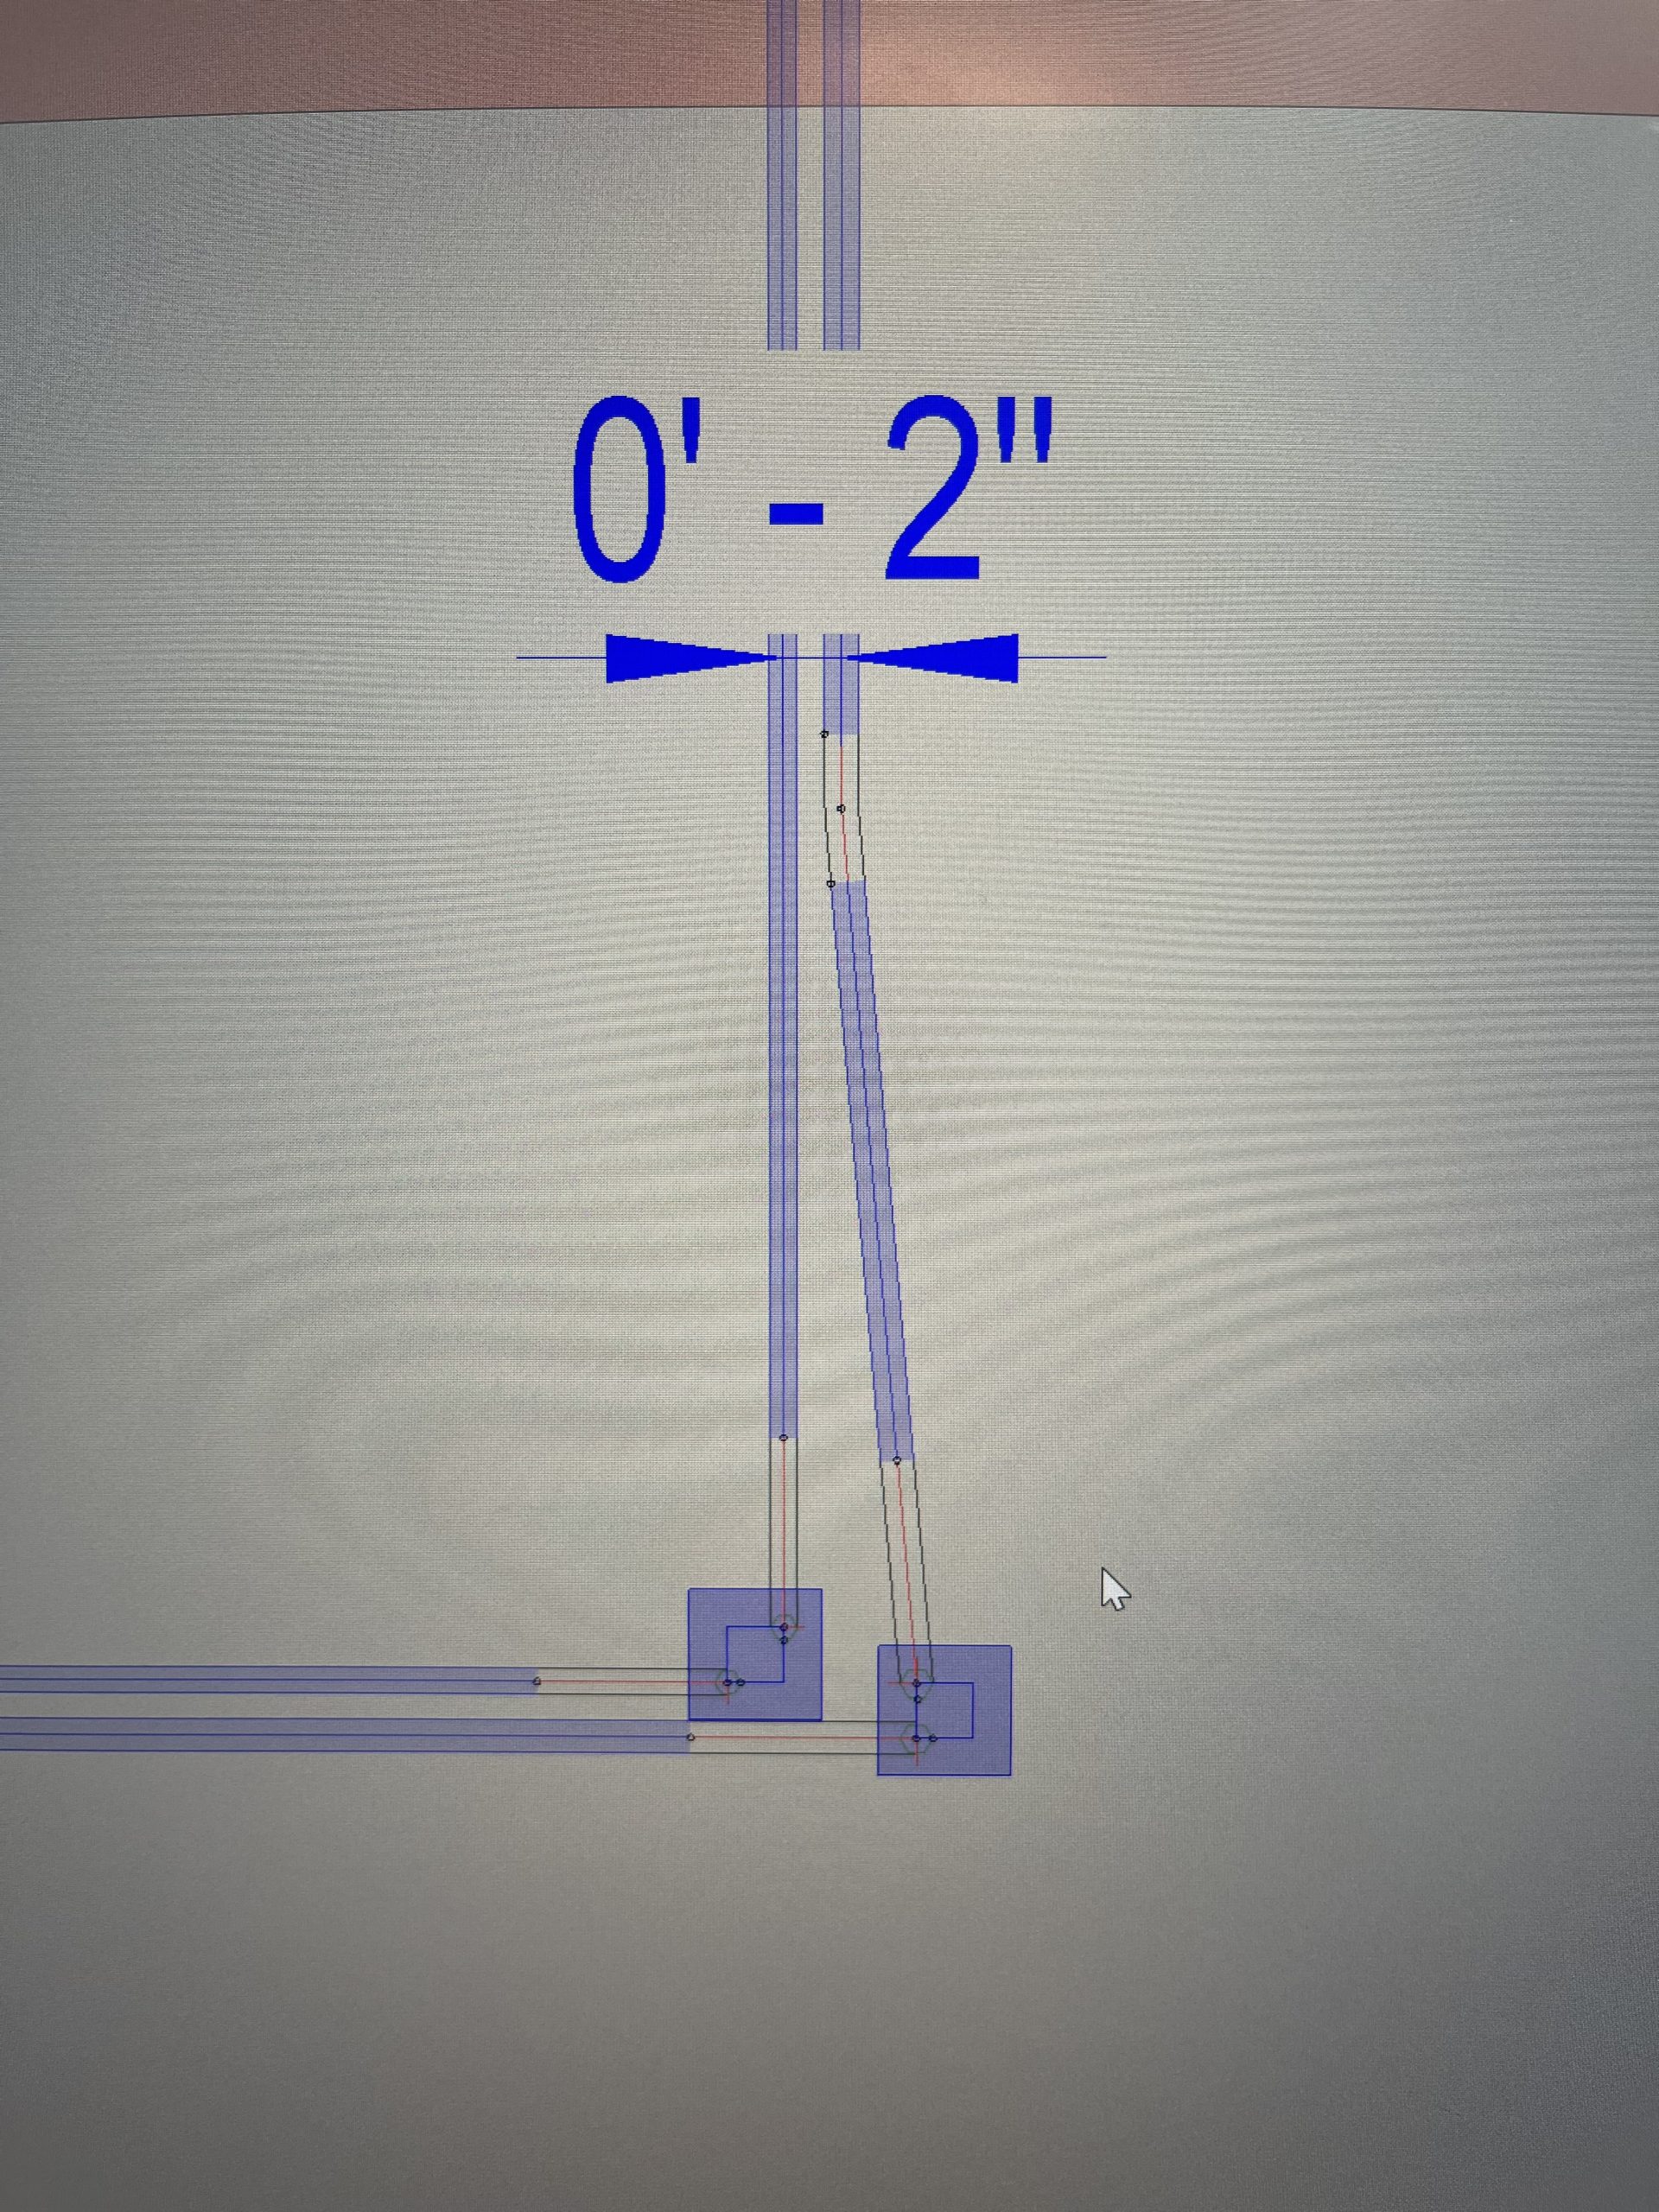
My internship at Miller Electric company has come to a close. And what better way to finish it out than hopping back into the model I’ve been hard at work in for the last 4 weeks of this summer. Daisy chaining. That is the word of the week and a term used to describe what I had to model when weaving my way under and over structural beams. The runs, or “daisy chains,” were created by cutting the conduit into 4 sections in a section view, rotating the middle two sections of the run, and trim connecting them in 3d to form a smooth wave of conduit. Since the conduit encountered multiple cross sections with HVAC the technique described above was used on several occasions. I will say it became rather satisfying to repeat the process. Seeing how smooth a clash free run looked as it glided over the HVAC. I could not have had a successful internship without all the support of the talent team, my managers, and my fellow interns and VDC employees. Although my summer at Miller is coming to an end, my time at this company is not. I hope to continue to model in this job here and there during the school year, as long as it does not disrupt my studies and life as a student athlete. I am very grateful to have been an intern at such an amazing company.

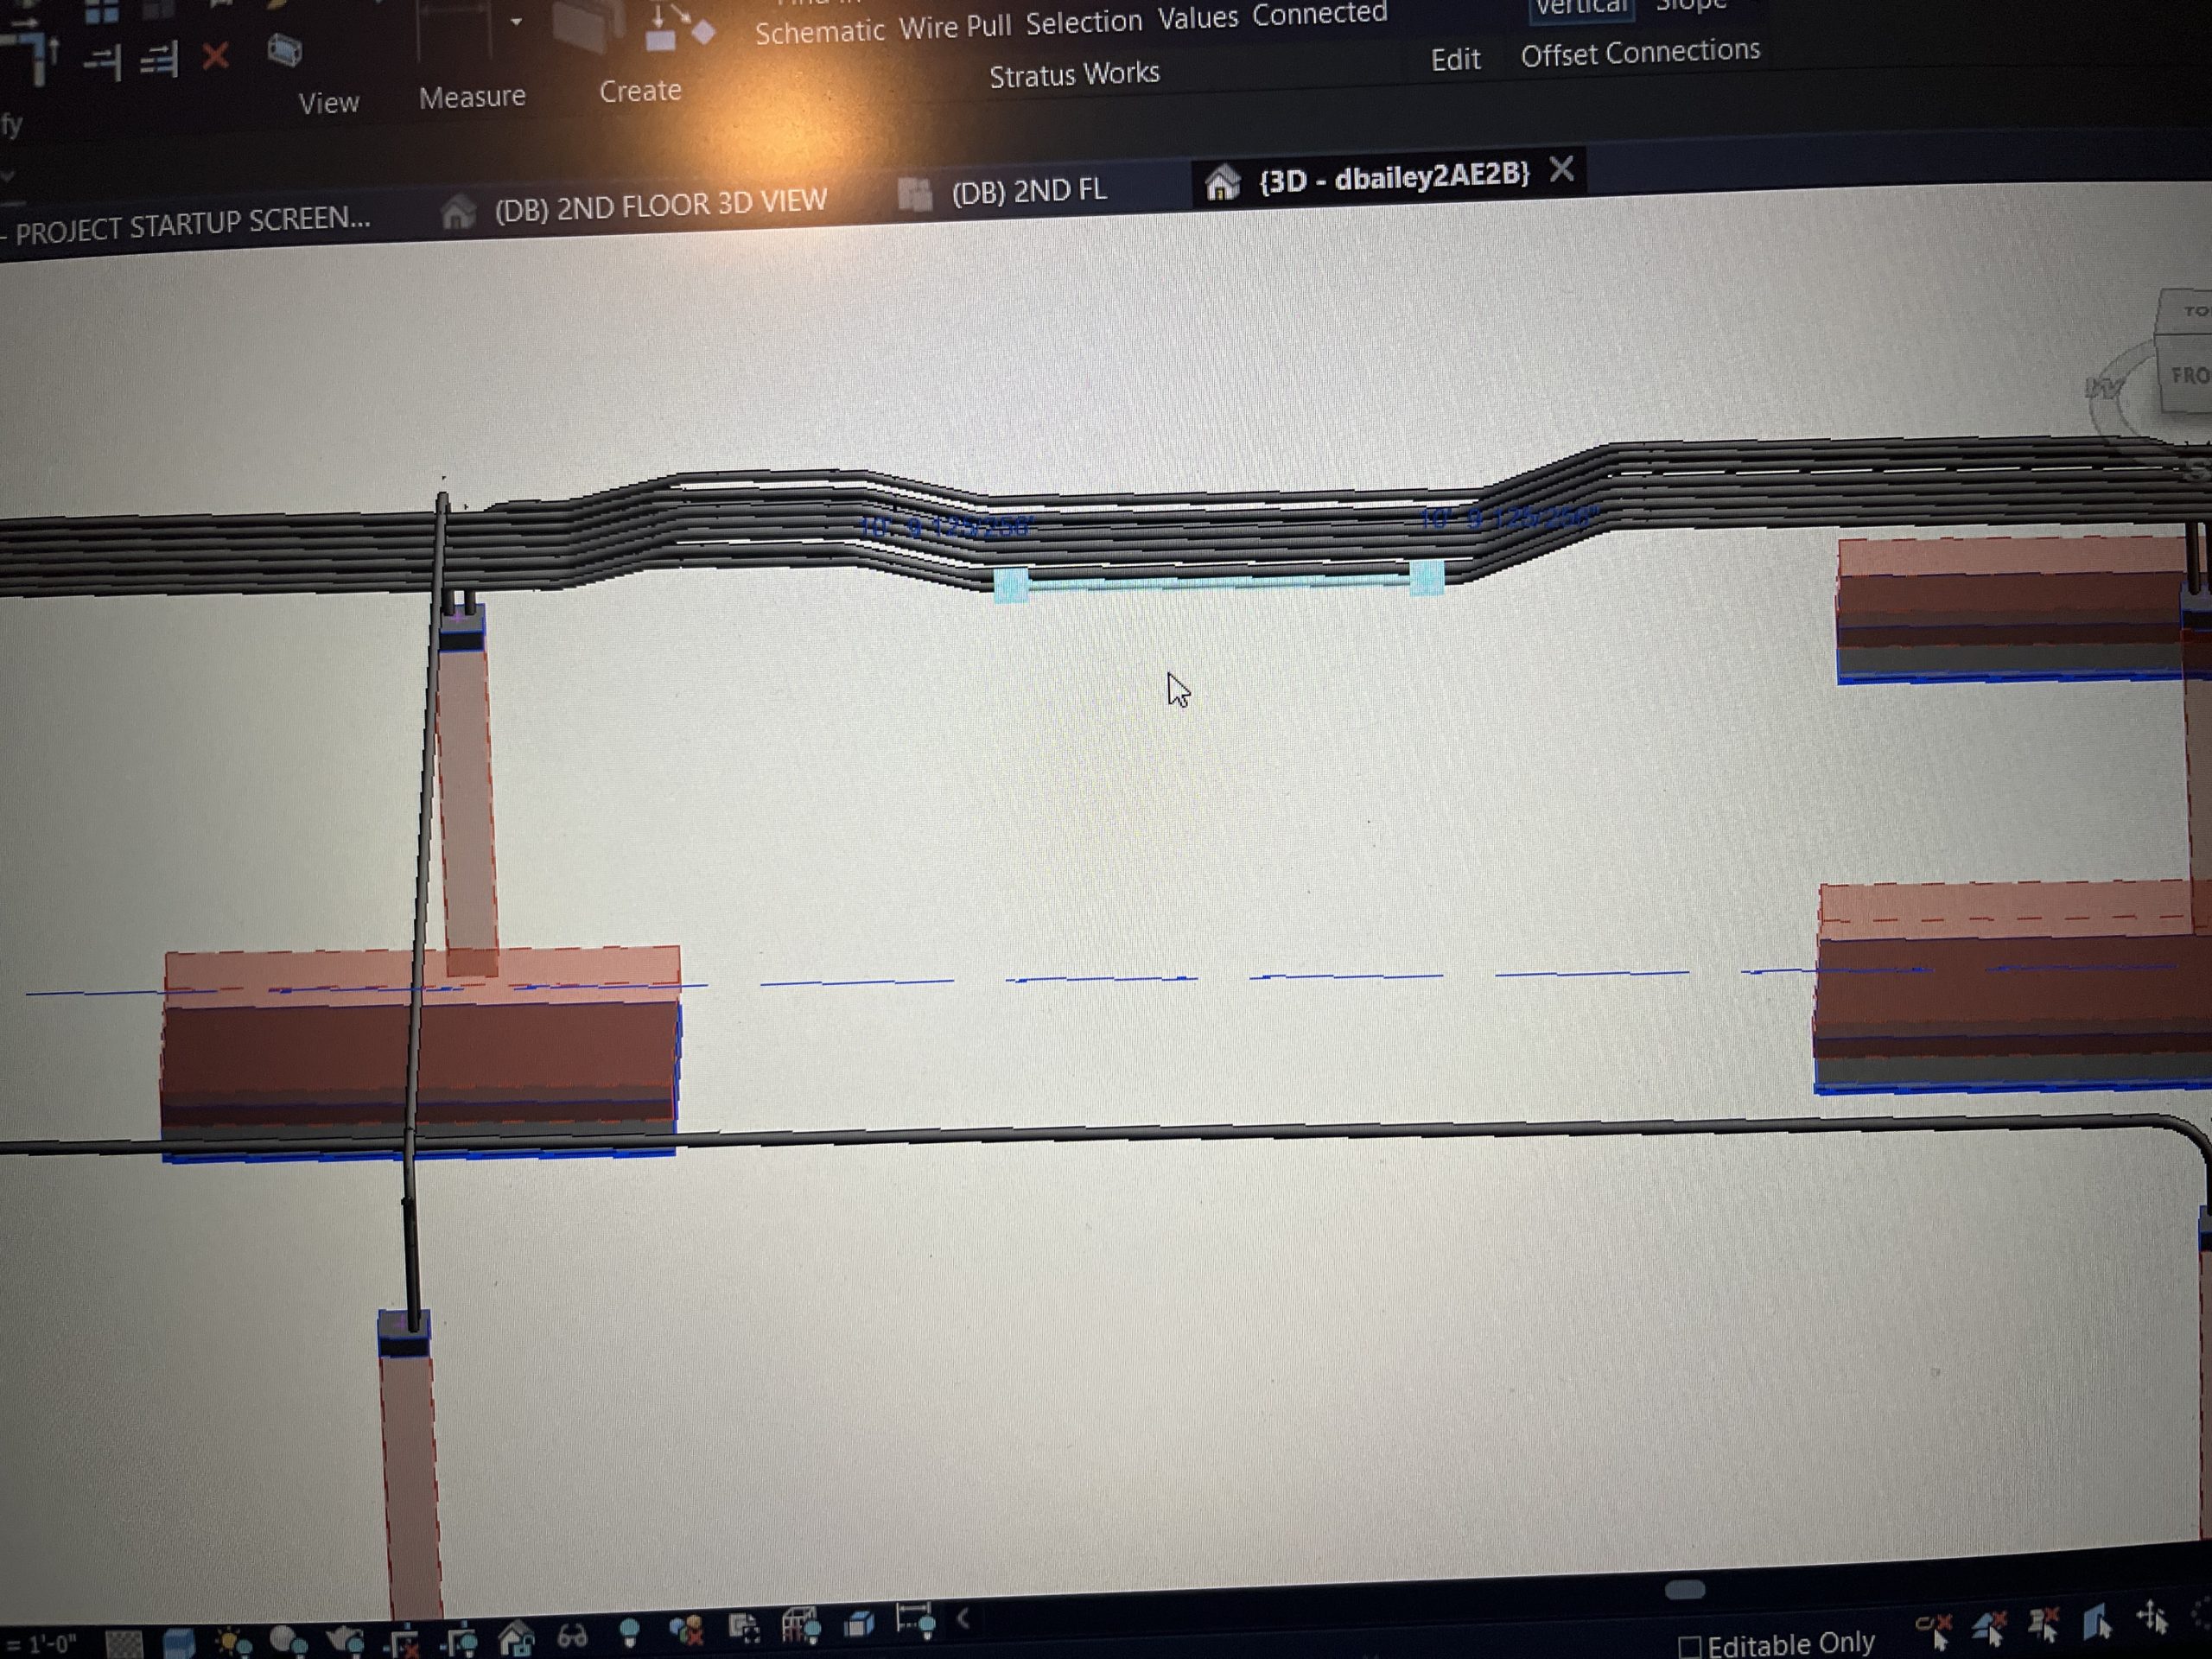
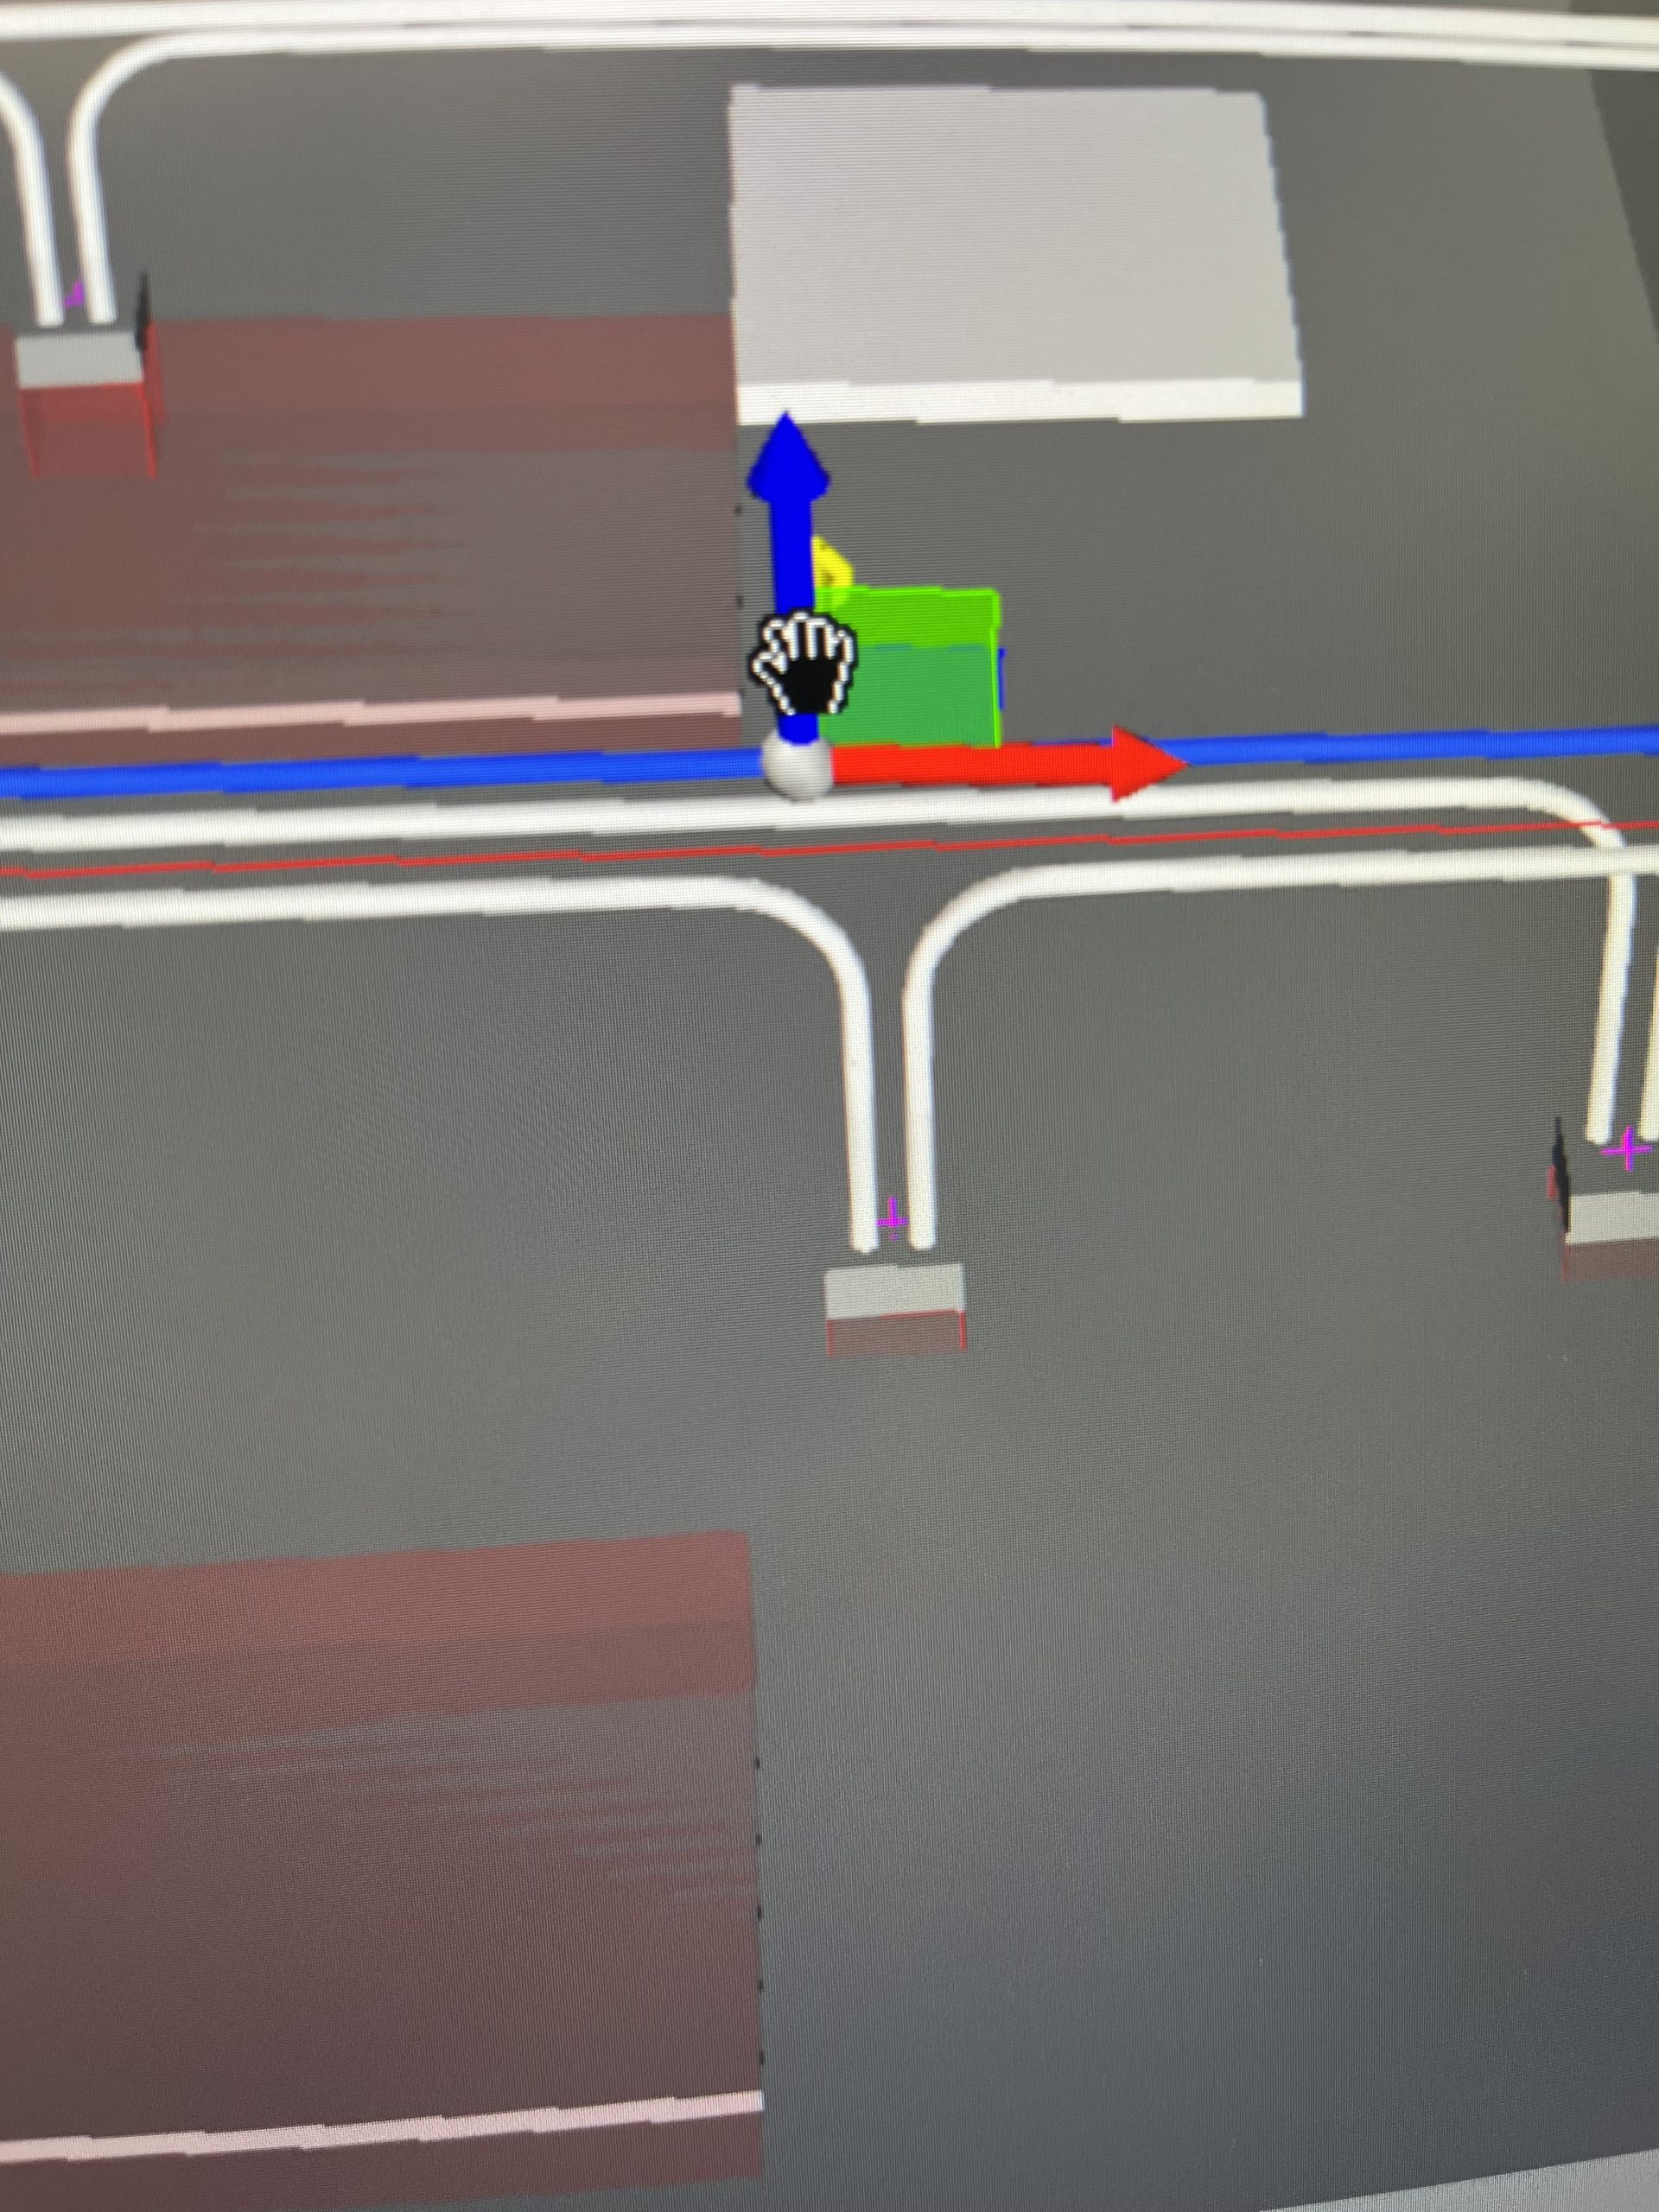
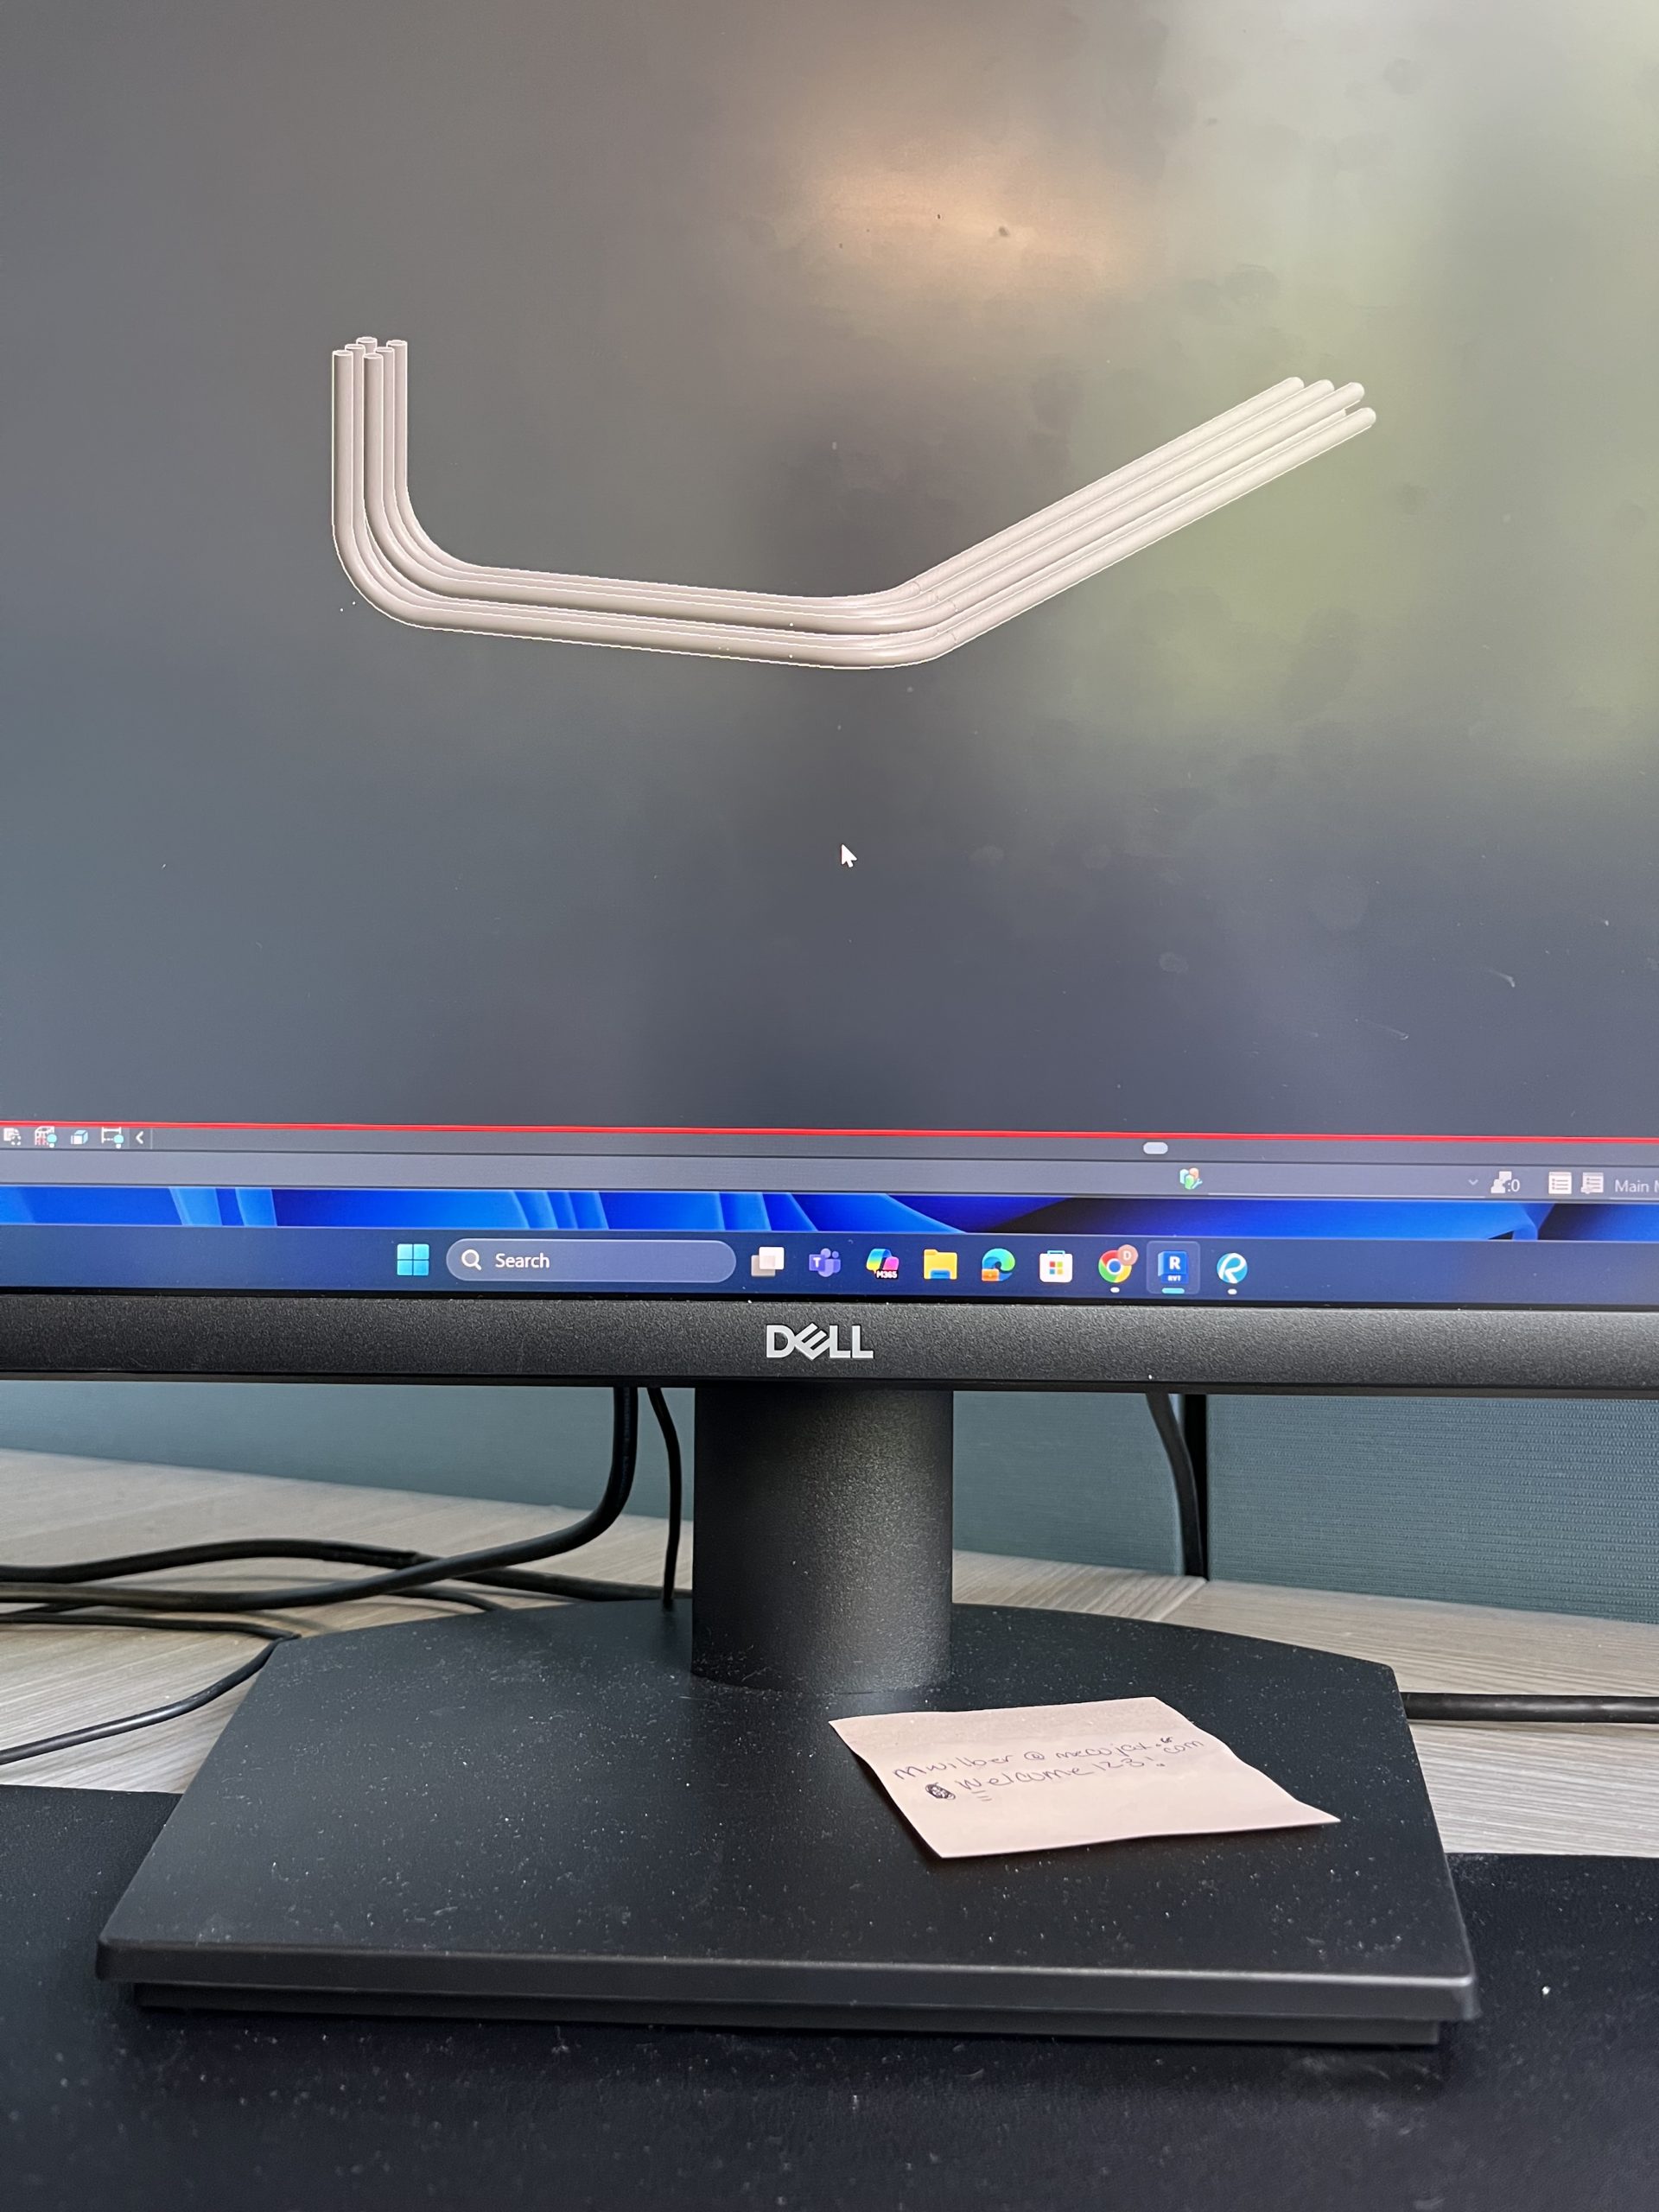
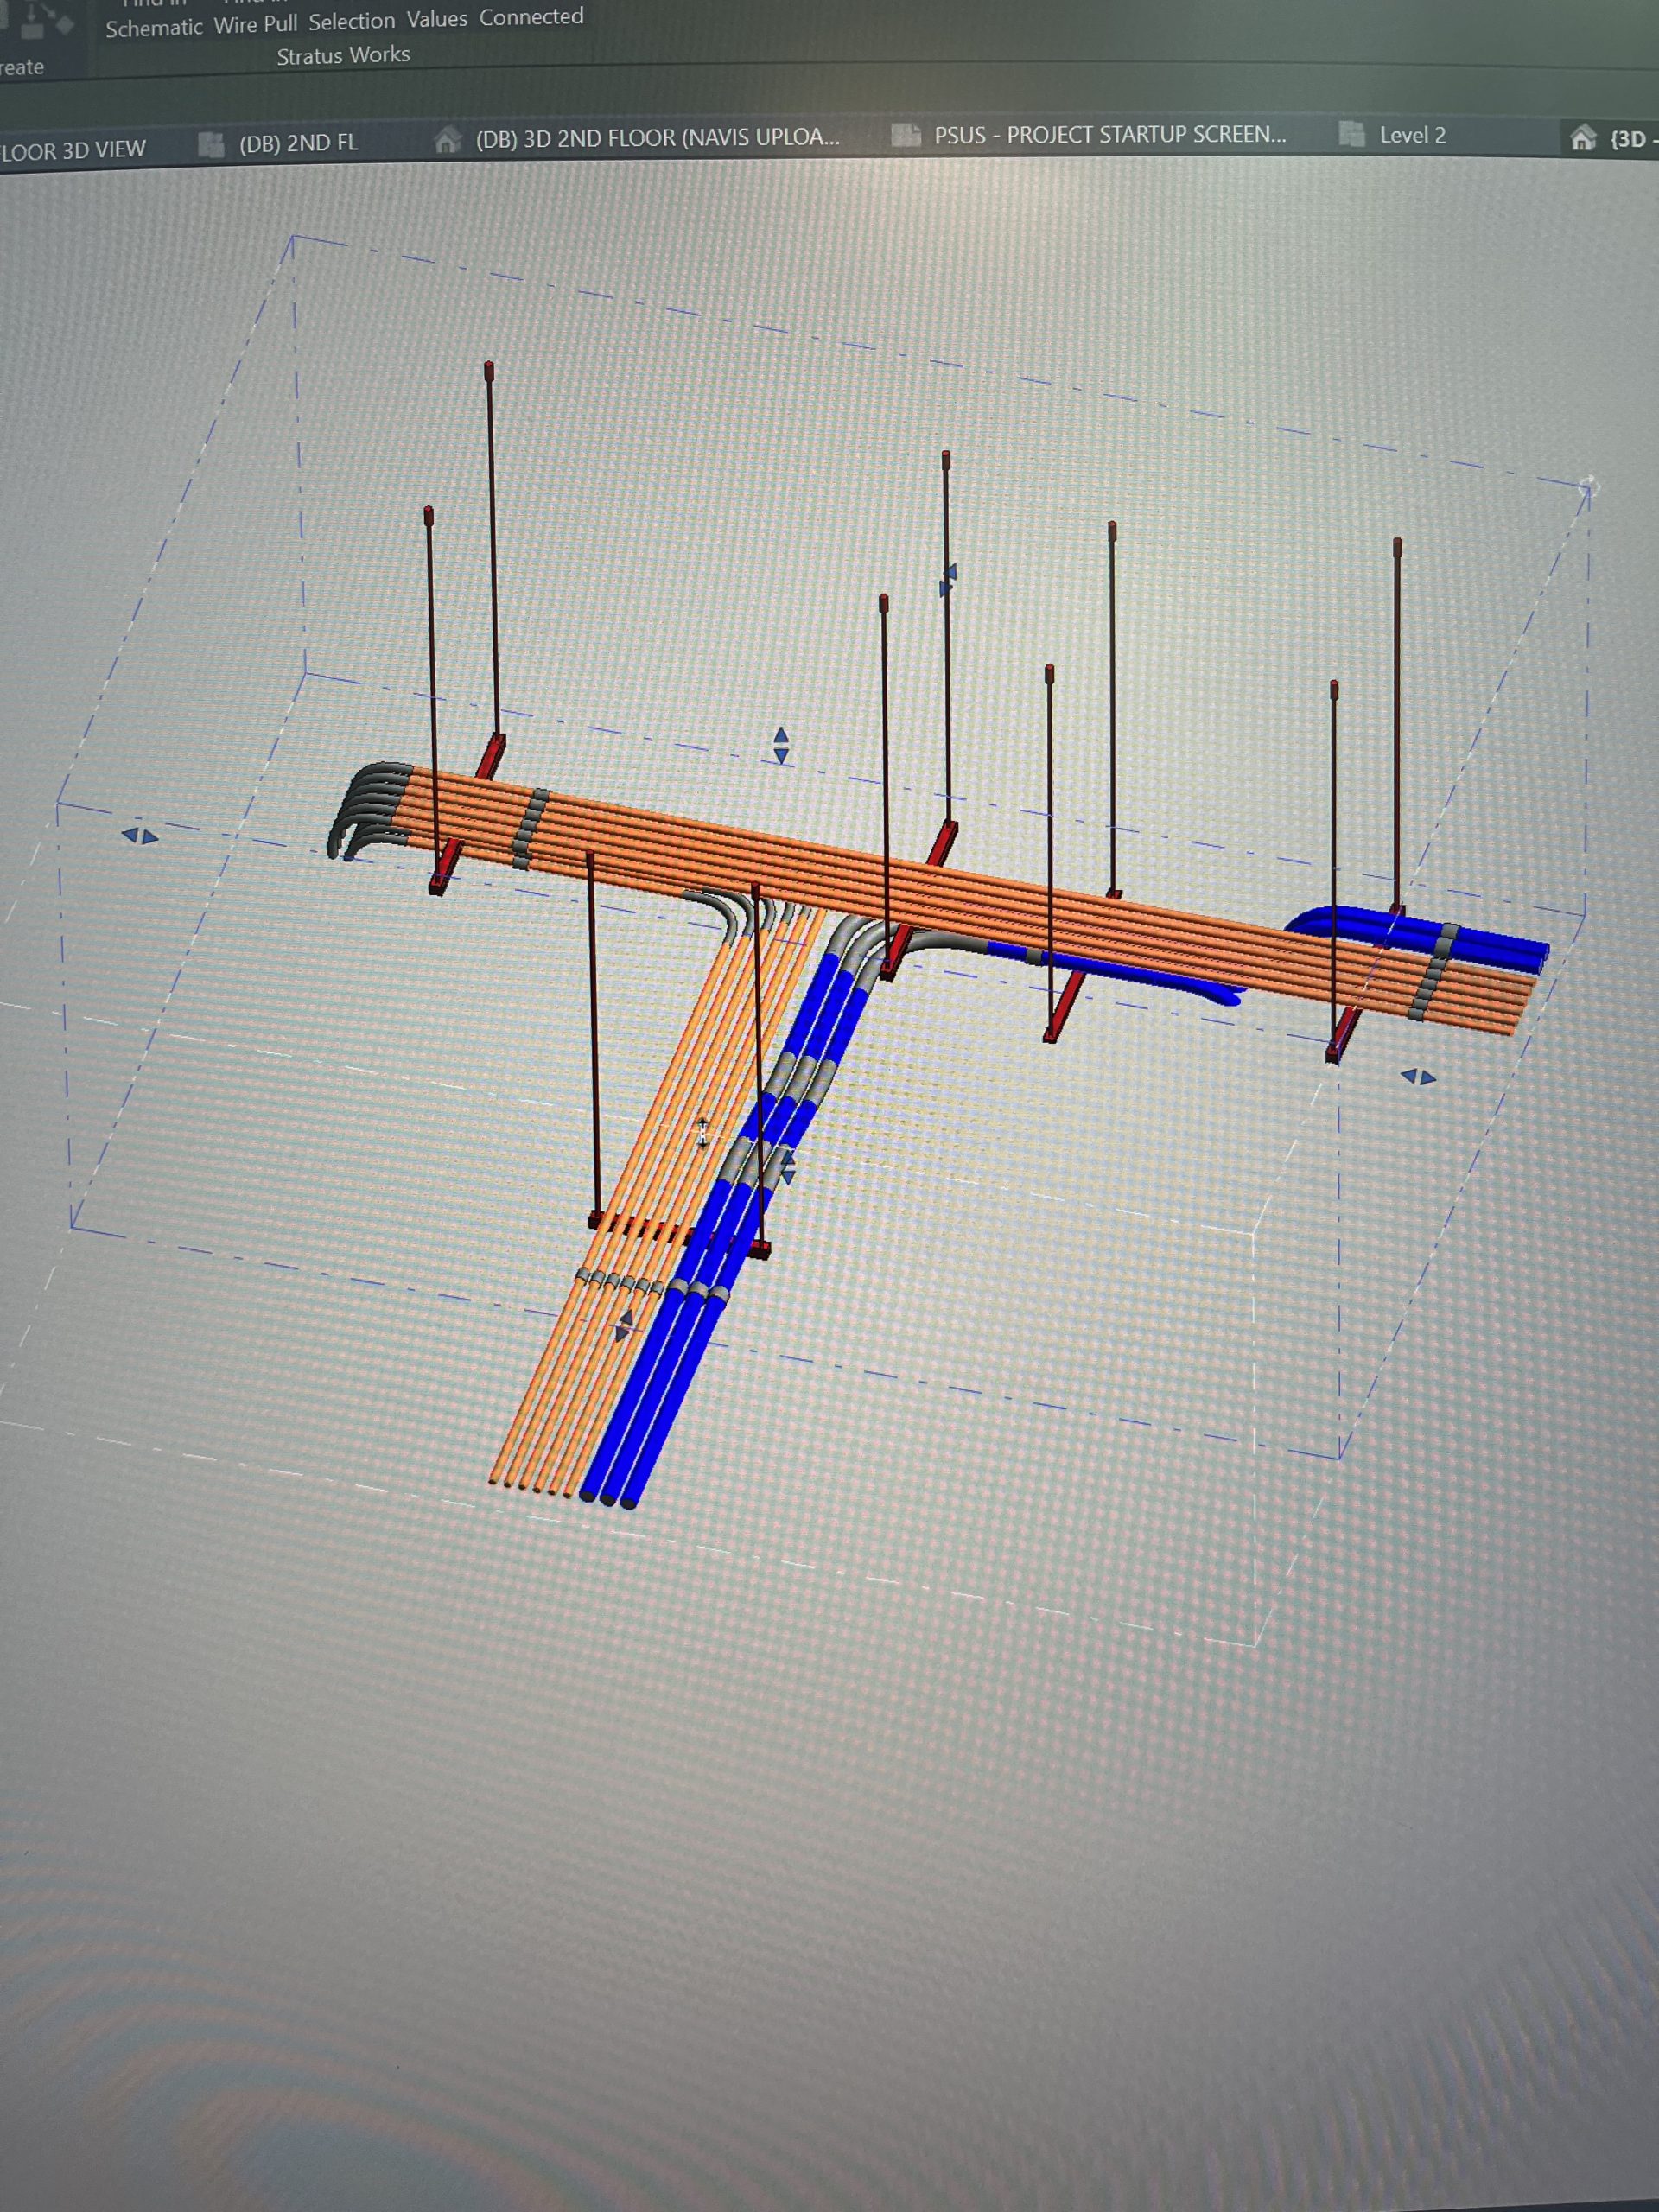
3d view within Revit of the daisy chain

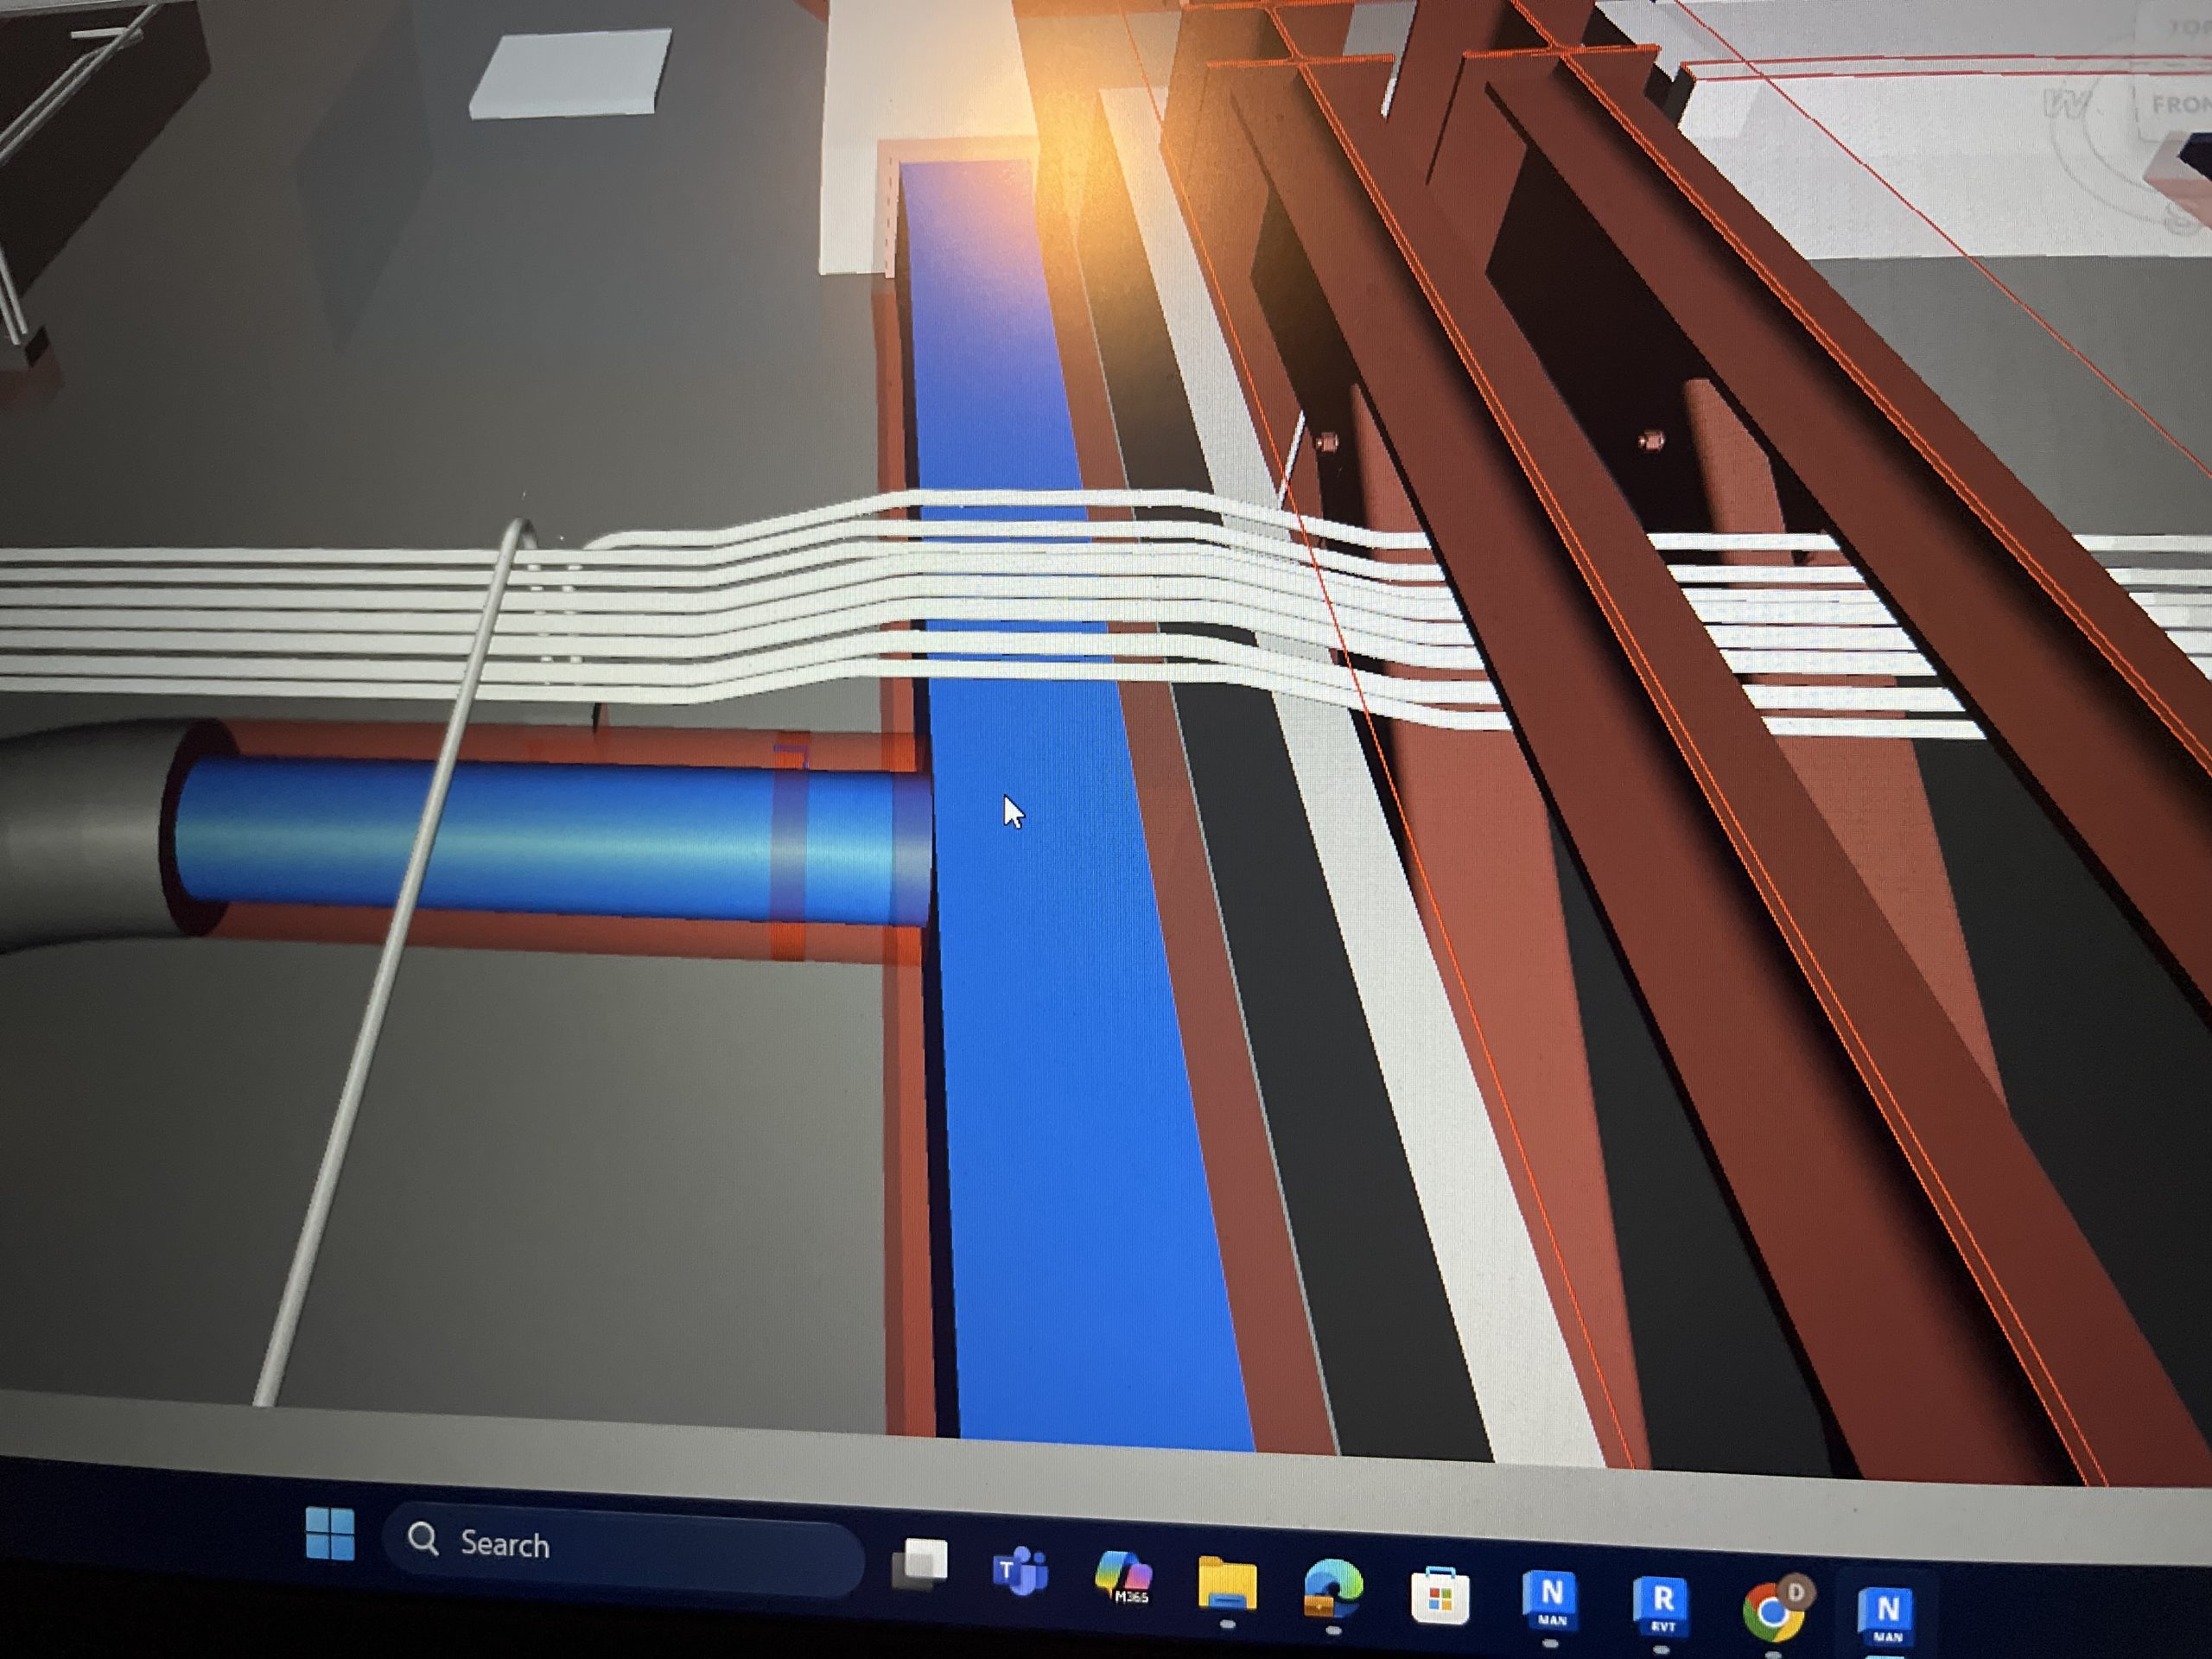
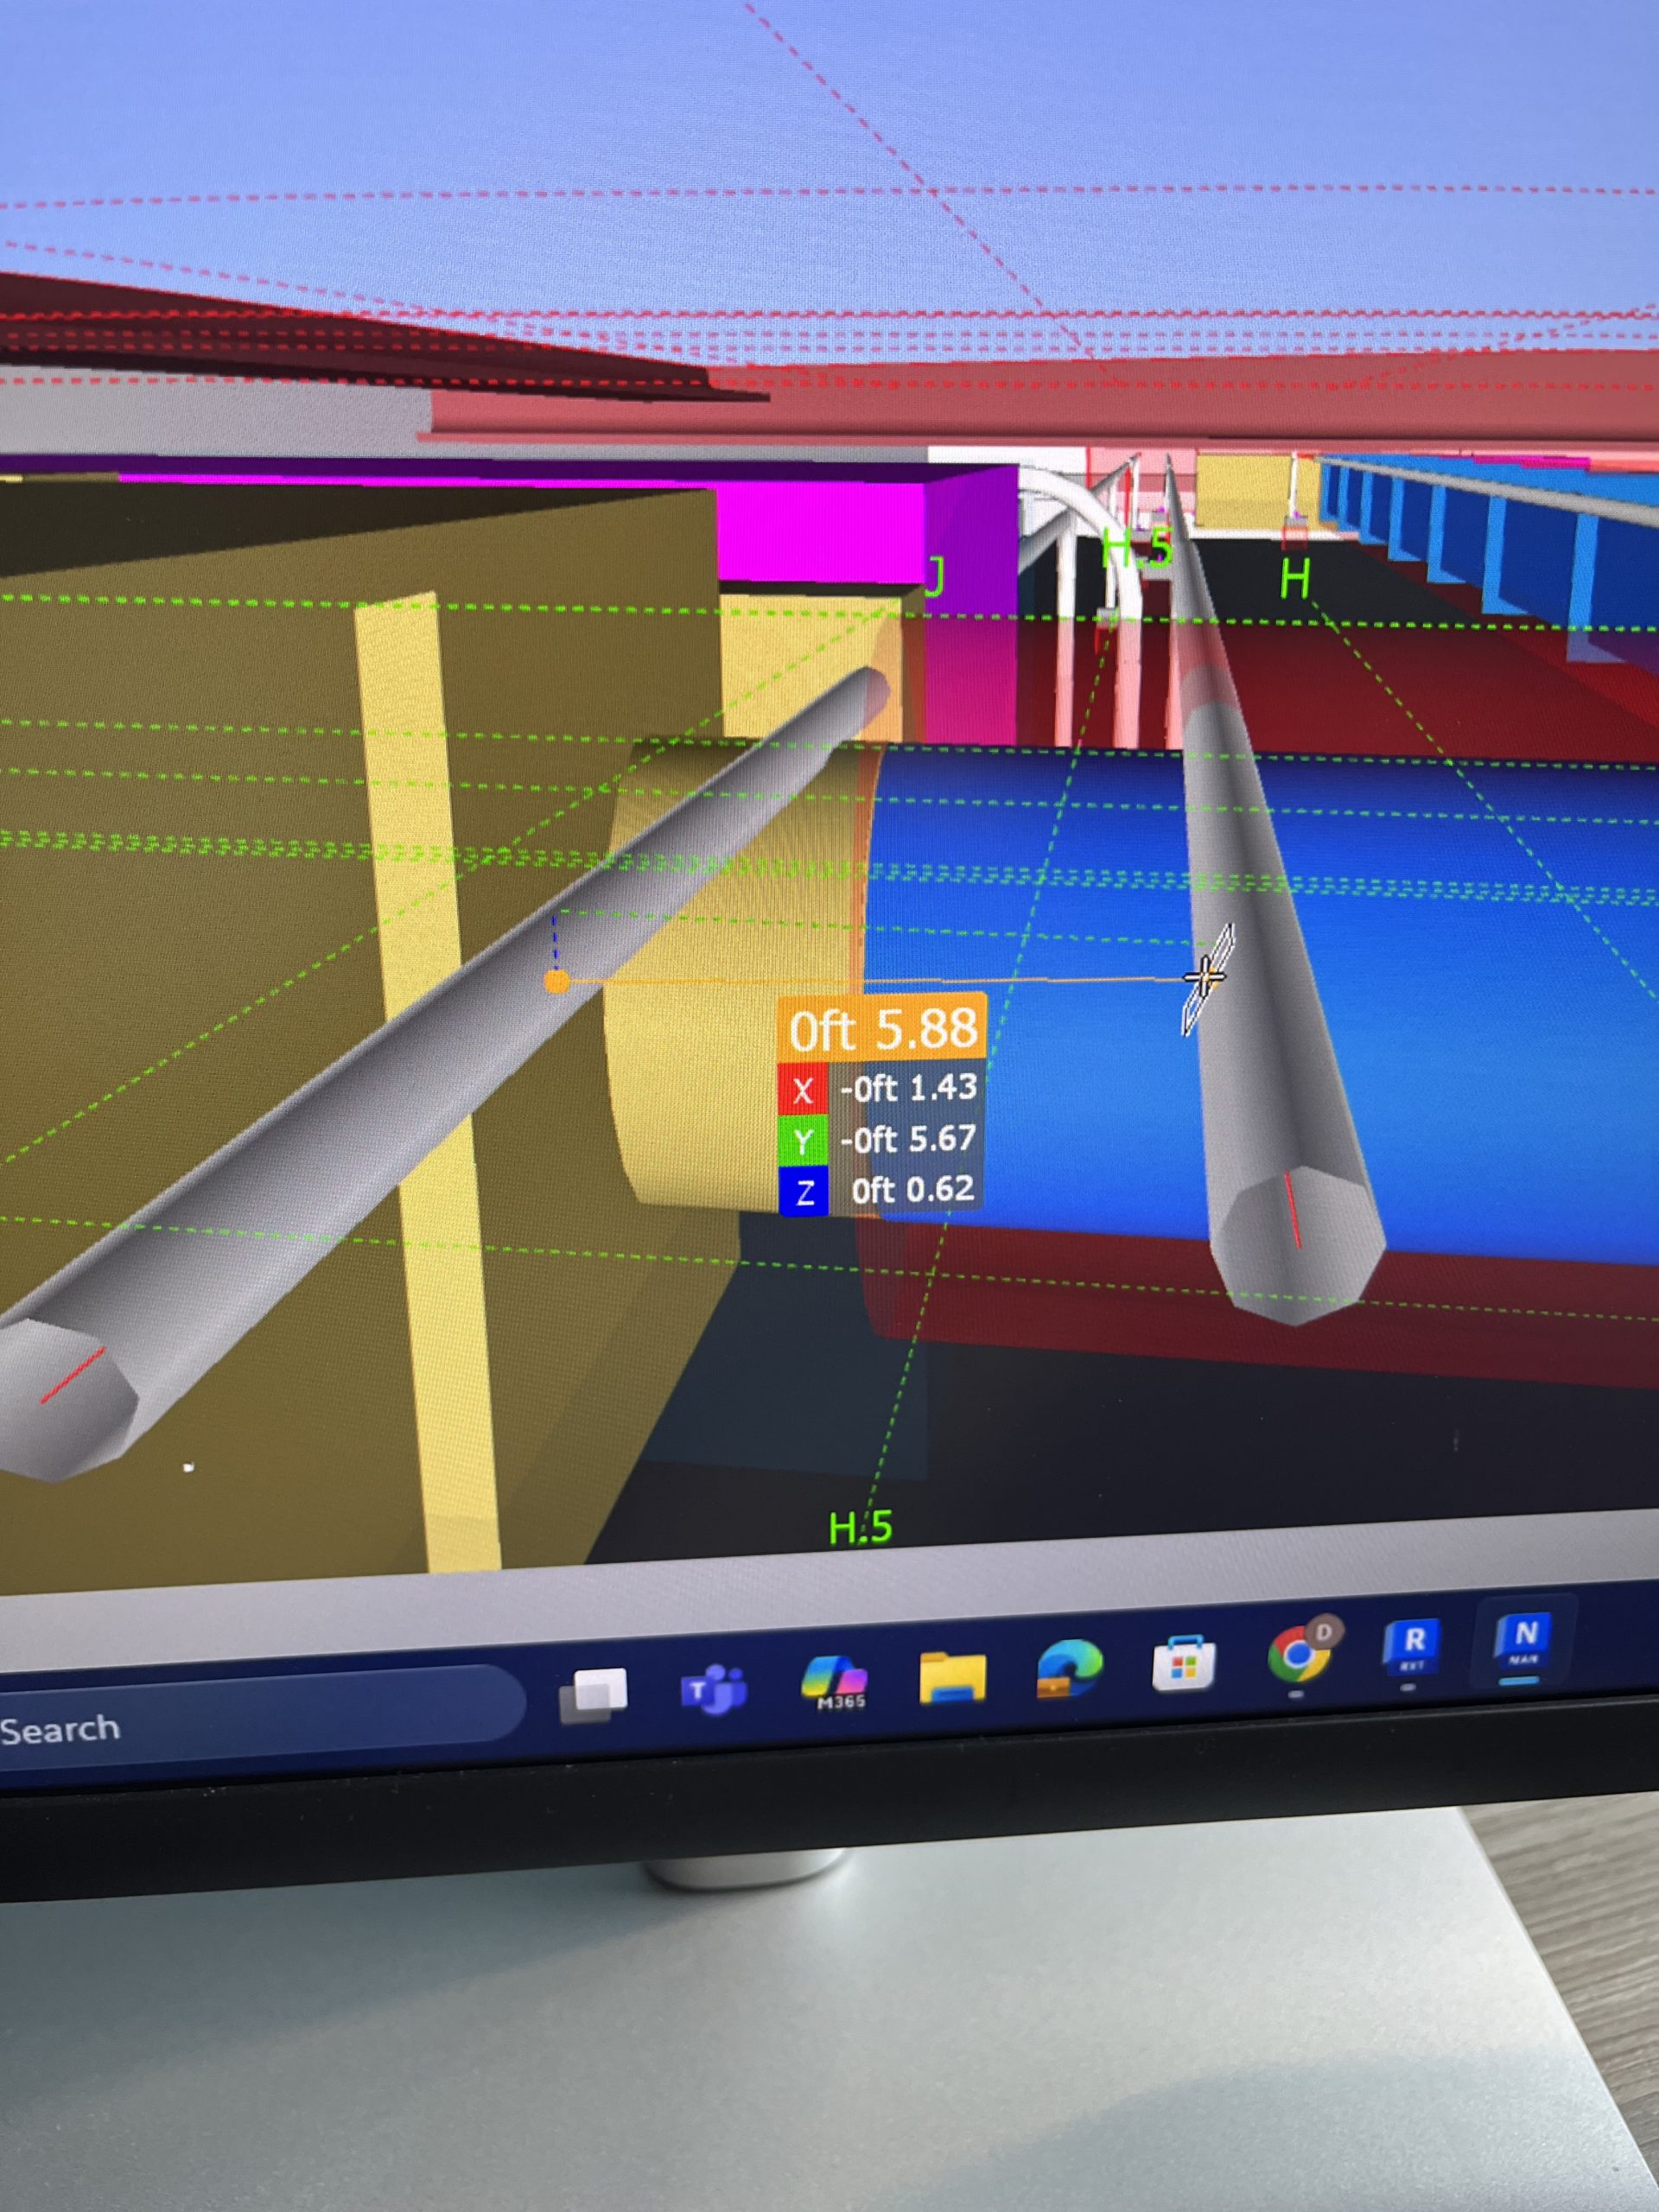
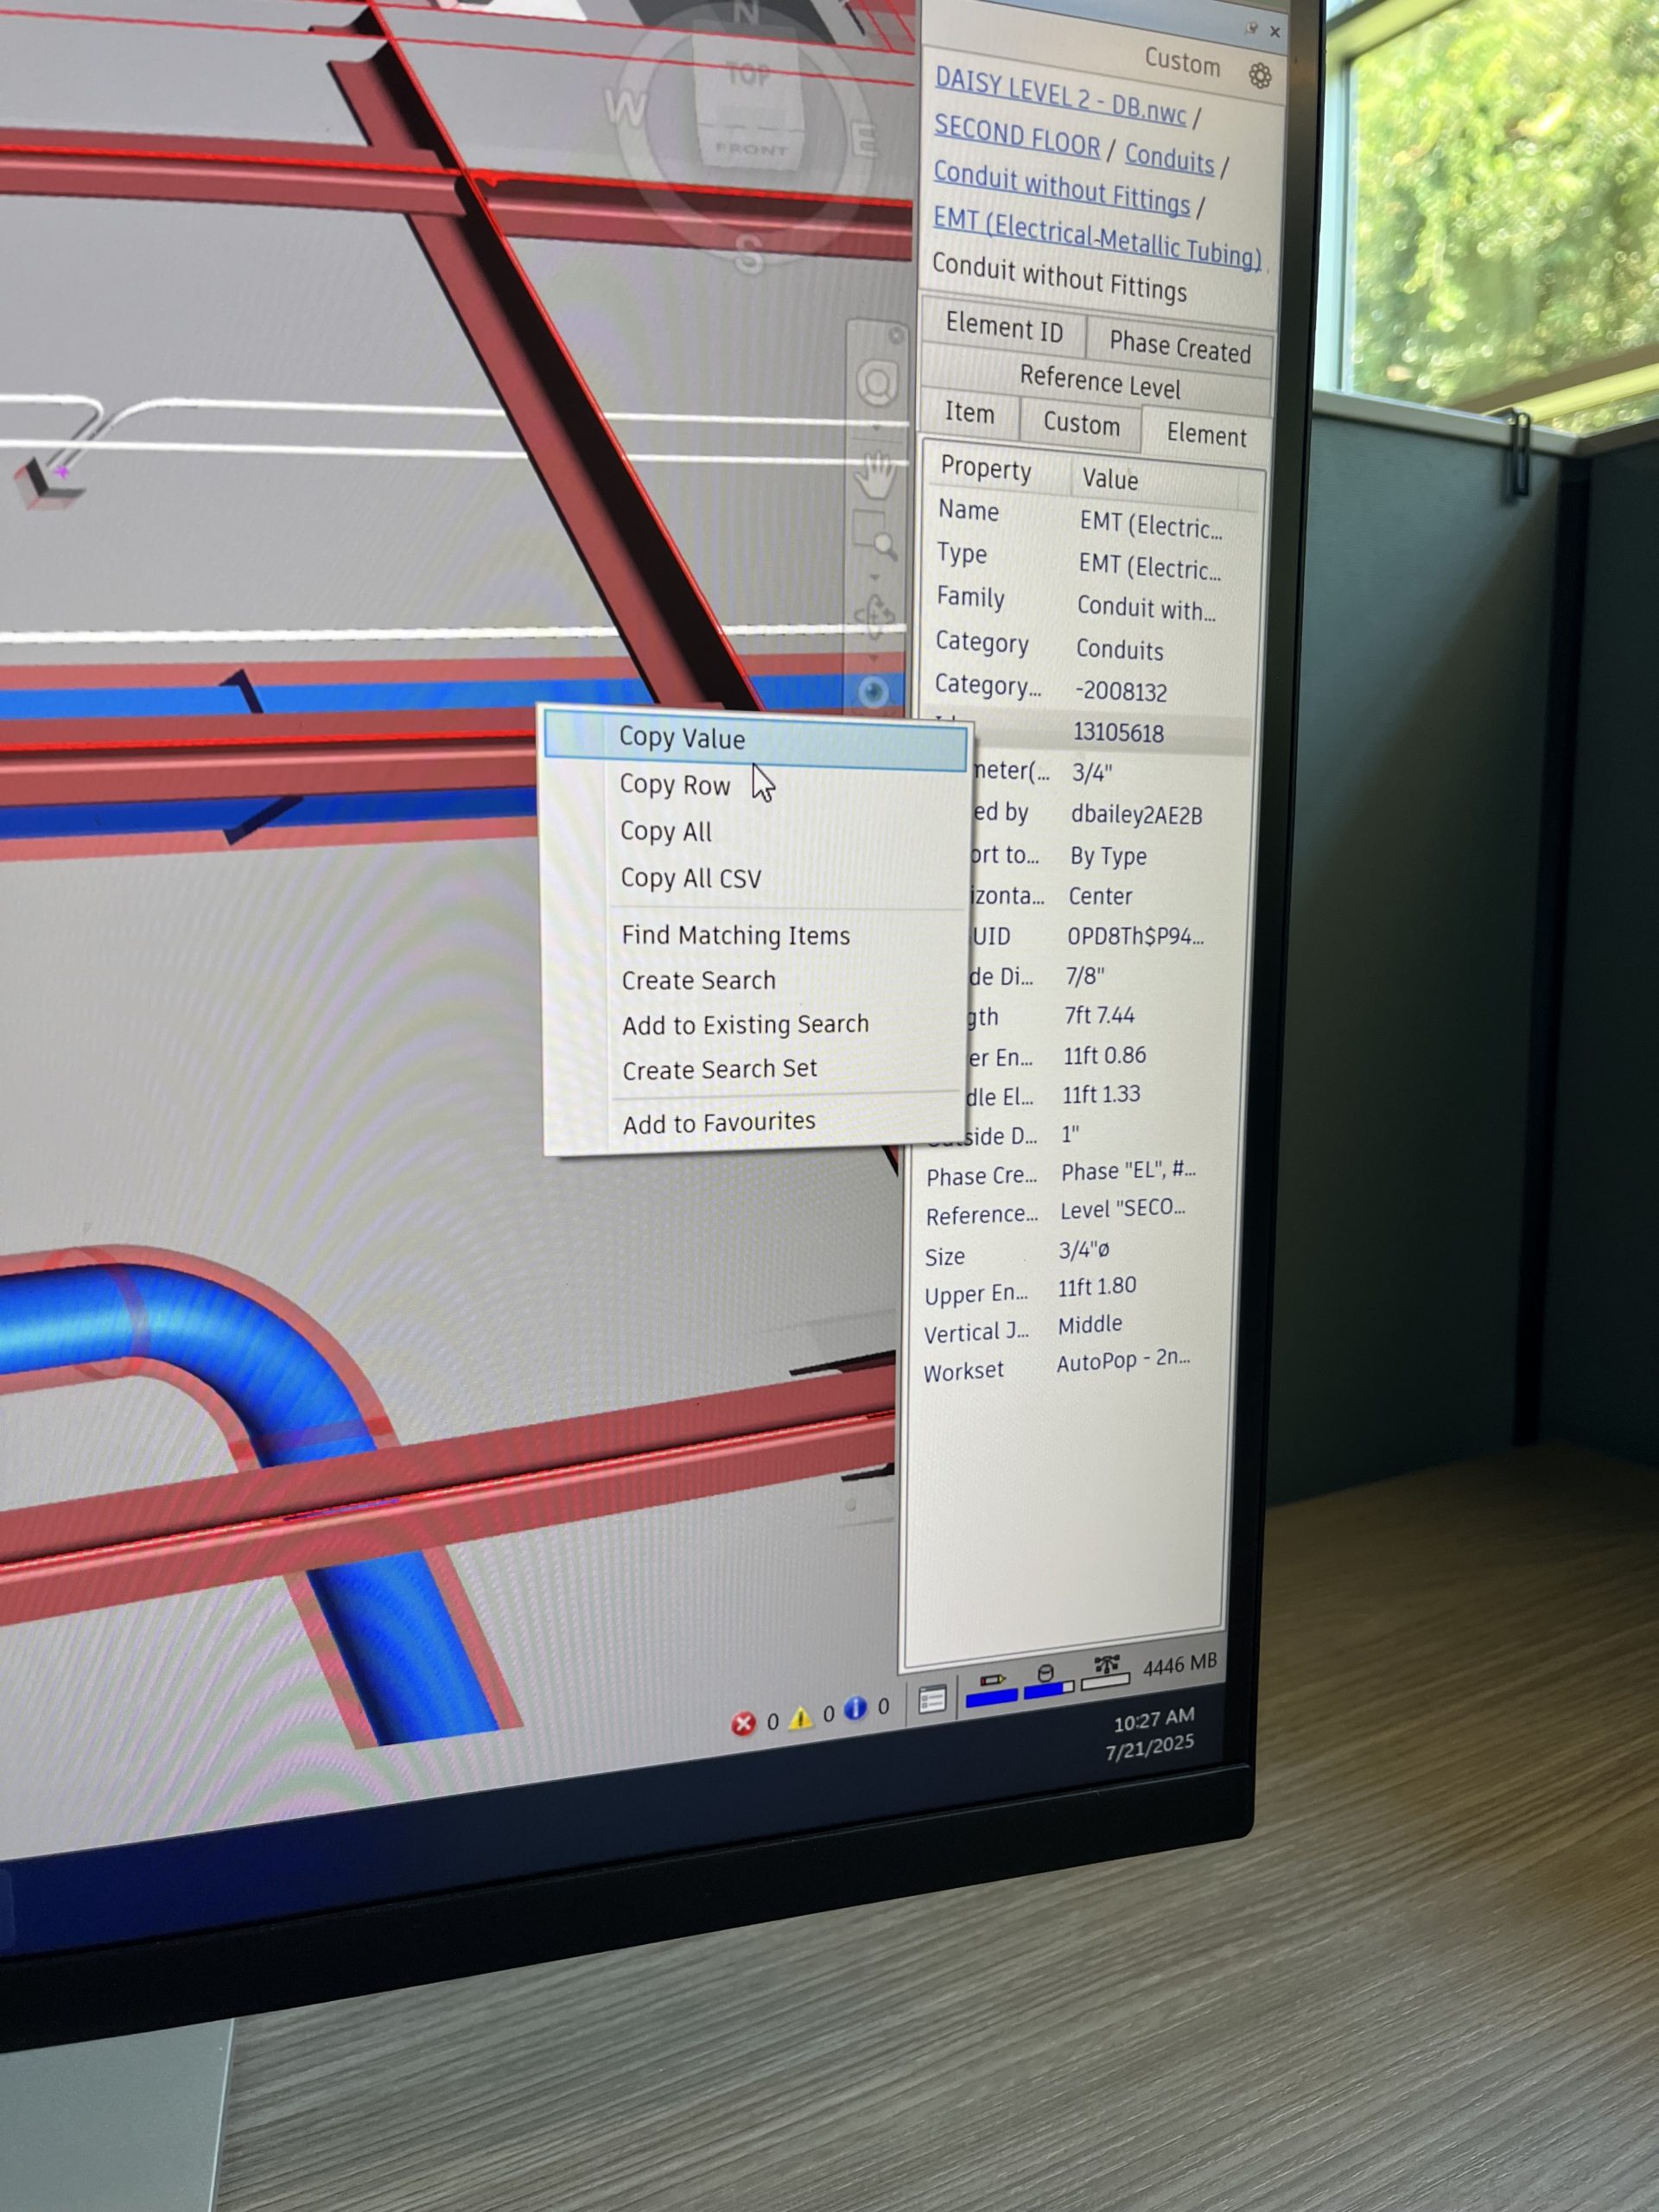
The daisy chain in Navis running over the HVAC

Week 9

A long week to put it simply. With class and football season starting up and being thrown into the mix of finishing the internship strong. I was still working in the same floor going through the routine of clash detection. Megan’s wondrous trick of the week for me was within Navis again. You can move and manipulate the conduit within Navis to gauge how much you have to move something on vertically or horizontally. Transforming and being able to see what the move will look like in Navis before I change it in the model is a game changer. Unlike using the measuring tool to just get the calculation of how far I need to move the conduit, I get to actually see what the result will be for an entire run or the specific clash I am trying to avoid. This tool has a similar function to adjusting and transforming the entire floor and sections of what you are able to see

The highlighted blue box in the bottom left corner allows you to pin the screen down so you don’t have to keep opening it up as you move around.

The blue red and green arrows is exactly the same for when using the move tool for sectioning off areas and different levels.

Next week will be more of the same work until the exit interviews and the wrapping up of the summer. Discussing the work I’ve done, and laying down what the next steps look like here at Miller! This summer has definitely flown by!

Week 8

Another week of the same work as the last. Lots of clash detection and moving conduit out of the way of HVAC. A trick I learned in Navisworks, the software that shows other trades, you can section off only what I want to export from Revit to Navis. The export feature allows you to append only what you have modeled to compare with the trades. This helps to not overload the software and make it run smoothly when you are trying to work quickly in one specific area. The model can also be refreshed without having to reopen it constantly.

Once inside Navis you can look up specific conduit IDs and then look up the precise location of it in Revit. This helps to find what you need to move instantly instead of having to scroll around and compare the floor in Navis and Revit. Navis also has a measuring tool. It can adjust and snap to the all sides of two objects you are trying to measure between. A very helpful tool when trying to fit conduit into tight spaces that need exact measurements. The Navis software also allows you to view every floor of the building or project. As well as adjust that floor and check on and off different planes for different floors or adjust horizontally or vertically what is displayed

Here is a picture of the measuring tool. Getting the measurement of the side of one conduit to another.

This picture is the exported file from Revit appended to the Navis main file along with the refresh button when changes are made.

These two pictures are showing how you can lookup the conduit IDs from Navis to Revit

Although this week was more of the same as the past couple it was no less rewarding and fulfilling.

Week 7

This week I was assigned to a new project. This project was a government building with a data center on the second floor. Data centers are a mess to say the least. A lot of wire is needed to run and operate a data center. And where a lot of wire is needed so is a lot of conduit. When a project starts it gets auto populated, which is where the model for the conduit runs is auto generated into the project giving a general layout for the where everything needs to be. However, all the boxes and spacing is messed up and not connected.

So the week mostly entailed me using section views to make sure the elevation was correct for the runs and checking to see if the conduit IDs matched the correct boxes they were running too. Along with making sure the spacing was correct. Spacing varied based on the size of the conduit. But for the most part it was a 2” spacing between the different conduits.

In terms of skills used this week in the software, I honed and sharpened the skills I have already utilized. Getting faster at pulling sections and manipulating the conduit or bends to appear cleaner . I did learn how to make and offset though. Which is where the box could be offset while the conduit spacing stayed the same.

Here is a picture of what that looks like.

I will be continuing to work in this project more again next week. I will also be meeting with my manager to talk about possibly coming on part time during school, and what my future could look like at Miller when I graduate.

Week 6

A short but very packed one. It was Fourth of July weekend so that meant a three day weekend, and that the office would probably be empty pretty early on Thursday as well. But all jokes aside there was still work to be done and of course for me, more things to model.

My week consisted of working mostly on underground conduit runs. A new challenge and underground is far different from overhead. The pipe is typically bigger for underground. The paths you can model are more flexible than the overhead. You can have bigger bends and not everything has to bend at 90 degrees to get where you want to go. This is because the underground conduit is ran through ducktbanks that are dig before hand and then filled with concrete once the pipe is in place.

Thanks to my more than helpful manager Tim Viau and his underground wizardry. I was able to model some of the underground pretty well. I learned new tools, such as the trim connect tool. A tool that allows me to connect the pipe without having to be exact on lining it up. Revit is able to auto draw the bends and connections using this tool. I also learned how to isolate exactly what I wanted to see using the Hide/Isolate tool in the bottom of the tool bar. This enabled me to focus just on the pipe and get a better picture of exactly what I was doing. Week six was a new experience and one that I learned a lot from. I will post pictures of the software and the new tools below.

This is what it looks like after using the Hide/Isolate tool

The goggles are the the Hide/ Isolate tool on the bottom of the tool bar

This is a picture of the distant after using the trim connect tool to auto make the bends

Week 5 Midpoint!

This week of the internship is “midpoint” week. That is what the talent team here at Miller has deemed it. Basically a week when all the other interns from the various branches came back here to Jacksonville for a check up of how the internship was going so far. It followed a similar flow to the orientation week.

We got to hear again from our executives and the CEO himself Henry Brown. The presentations during this week mostly revolved around resilience and more self reflection tools to help further our communication and collaboration skills. Along with presentations we got to tour and see the new Jacksonville Jaguars stadium that will be dawned Miller Electric Center when it is completed! Being a football player, this was definitely a highlight of my week. Miller is doing all the electrical work for the stadium and has been a great partner with the Jags for along time. Being apart of a company that has ties to an NFL team is something I find truly remarkable. I never knew how many different and niche things the world of electrical was apart of.

The second highlight of the week came when my do it all manager Megan Wilber came up to me and asked to do some small detailing to help out. It really made me feel like I was apart of the team and could add value to the company. She knew I was involved with a lot of the midpoint events but still wanted me to come and work. Which I was more than willing and excited to do.

The midpoint week was fun and filled with some pretty mem experiences, but I am very much ready to get back into modeling and the normal work schedule!

Week 4

This week had a similar experience as last week. I continued to work on projects related to real jobs the company was involved in. However this work involved more of the project coordinator aspect to the department I am apart of.

This week’s main task for me was to find percentages of different levels of the project. I would contact different members of the modeling team to find what percentage of their level or floor had been modeled. The structure of this was broken down into three subgroups. These were model population, model cleanup, and model coordination. Population consists of getting the runs of conduit and equipment placed into the floor. The cleanup aspect is making sure the now populated level does not have any clashes or issues. And finally coordination, which is working with other trades so that nothing we model will clash with their work.

The task was proved to be rather difficult. Getting people to respond in a timely manner when they are busy working is not the easiest task. But I was able to get some responses and get somewhat of a picture for where the project was. But tracking down percentages was not the only thing I was tasked with. I was also given the job of checking to see if the size of the transformers we were installing matched with the submittals we were given for the job. This was a more tedious task. I had to go find the transformers on every level and match them to which transformer it represented in the submittal. The submittal was an 82 page pdf with 6 different types of transformers. Luckily I had a one line drawing, which is basically a road map of the layout , including which size the transformers should be on their level. Having the one line made the task much easier and allowed me to complete it.

Although this week had some tedious tasks it was still a fun and learning experience. Next week is our internship midpoint. All the other branch interns are coming back. I can’t wait to see what the talent team has in store for us!

Week 3

Actual work! This week I was able to participate in some actual working projects that the company is working on. I cannot disclose the details of the project but I can report that I was able to apply many of the skills I had been learning in the video tutorials and practice model. Putting together these runs of conduit while avoiding and preventing clashes and obstructions by other trades or even my own conduit It is like putting together a puzzle that is always changing. Since the models are all on a cloud that everyone on the project is working on has access to. People are always updating the models and working to make it “clash free” as they say.

I did get to learn new skills while working on the project. I learned how to manipulate the views I have access to further. I can control the box the model sits in and size it down to cover levels and areas I do not want to see so I can get a better idea and understanding of what I am seeing. Here are some pictures from the software to try and explain further.

These pictures also kind of bring to light some of the other views I talked about last post.

The current project I am working on is in its beginning stages. So, I have pretty much finished all I can for the project at its current point. But I hope to have an impact on it further as it progresses and gets more put in place and laid out. This internship still proves to be exciting and full of opportunities to keep learning and growing.

Week 2

The second week of the internship was far less exciting than the first. It consisted of me watching tutorial videos and playing around on the Revit software in order to learn it and be able to apply it to the work I would be doing as an employee here at Miller.

The software is very intuitive and can really be changed and manipulated to suit each persons personal preference and workflow. You can input add-ins to the software for different views. Even within the software you can pick and choose what and how you want to see what you are working on( thank you Meghan for the tip). Meghan is one of my supervisors, she’s awesome. Anyway, for me, I liked to utilize the tab view feature. Which allows me to see multiple views all at once. I can have the 3d view on one tab, the section view in 2d, and the full layout of the sheet drawings. Having multiple views has allowed me to work more efficiently in drafting the practice model I have been given to work on. The fun and also the most challenging part about this internship for me, is the fact that I am learning electrical as well as how to model and use a new software. It is both exciting and daunting at times. But an unforgettable experience, and I am only two weeks in.

Asking other workers and my fellow interns has been a great help to figuring out the software and just how Miller operates and completes projects . Although this week has been unexpected and ever changing. It has been a productive and enjoyable learning experience.

First week

Dalton Bailey

An internship. My initial thought going into an internship with a huge company, Miller Electric, was that I will most likely be going around the office passing out coffees and delivering various papers for my manager. However, it was nothing like what I imagined at all.

My first day on may twenty third was a hailstorm of emotions. I was eager, excited, and hopeful. But at the same time terrified, nervous, and anxious. This is mostly to the fact that it was my first internship. But also because I wanted to make a great impression. I couldn’t wait to see what kind of tasks and jobs they would have me do, or what a normal day at a company was like. We started off the day getting our id badges so we would have access to the building and various rooms we would need to be able to enter. The rest of the day was filled with speakers and presentations, learning about the company culture and core values. The speakers were all quite inspirational. Most of them also happened to be executives of the company. It was day one and all the interns got to meet and greet with executives of the company. It blew my mind.

The rest of the week followed a similar pattern. We would come in eat breakfast listen to more speakers and do fun activities that had to do with the company. The most notable and fun of the activities we were tasked split into groups and using Legos we had to design and sell our products to other tables. With the goal being to make the most profit for our little table of 4 interns. The task was both challenging and exhilarating. It taught and opened my eyes to how a construction and electrical company worked and how sometimes an opportunity for success really comes down to who you know.

All in all the first week was a blast and although it was sort of an orientation week to get us familiar with the company and what it would be like to work there. It was an unforgettable experience. I cannot wait to see what the next week will hold at Miller Electric Company.